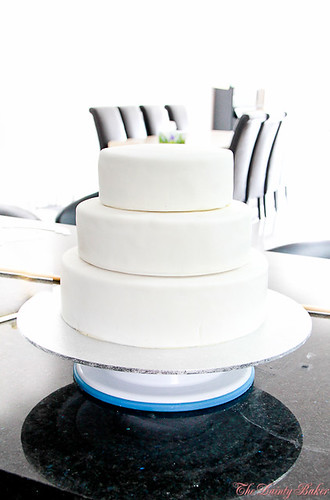
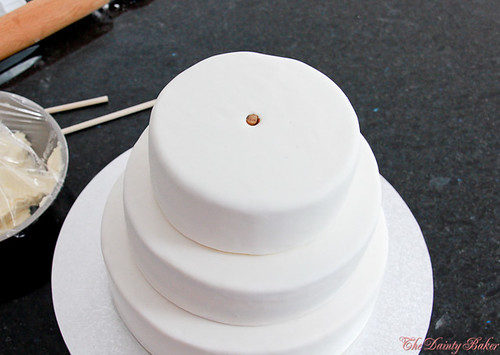
I will show you step by step how I stacked this three tier cake I made for my brothers Valedictory dinner.
Step 1: Prepare all the tools you will need.
This will include:
- Wooden dowels - you can buy these at cake stores, they are usually only 30 cm long (see pic) or you can also go to Bunnings and get their wooden dowels approx 5-8 mm in diameter, these are like 1 m long. Note - you will need 1 longer central dowel to go through the total height of the cake.
- Wood cutters (or something similar to cleanly cut the dowels)
- Buttercream/royal icing
- spatula (always handy)
- mallet (optional)
Step 2: Have your cake tiers prepared and ready to stack.
It is up to you how you want to finish/decorate your cake i.e. buttercream or fondant etc (possiblities are endless), but make sure that each tier except the bottom is sitting on a foam or cardboard cake board. The bottom tier should be placed on a sturdy wooden cake board or surface that wont bend and will take the total weight of the finished cake. Usually this can be achieved by thicker cake boards not necessarily larger.
Step 3: Figuring out how many dowels to use per tier
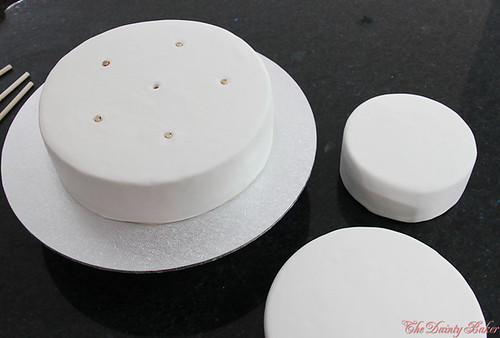
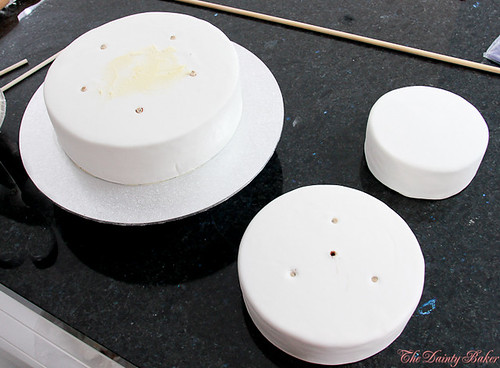
I like using odd numbers. So for my 10 inch round cake I have got 5 dowels, the 8 inch round I have 3 dowels and obviously there are no dowels in the top tier. I have a central dowel through all the tiers to stop the tiers from sliding.
Honestly, there isnt really a science to how many dowels to use per tier. But I have found that these numbers work and if you are worried about the structural integrity you can always shove a few more dowels in there for piece of mind. The only thing to remember and keep in mind is that no matter how many dowels you use, just make sure that they are even spread so that the load is evenly distributed. Also, I'm being 'Captain Obvious' here but, the lower and larger tiers will need more dowels than the tiers above as it is supporting the weight of those above, just needed to say that. Oh and do not go crazy and put dowels too close to the edge or outside of where the tier on top as 1. it will show when you stack them and 2. its redundant as it isnt supporting anything.
Step 4: Measuring out the dowels
You will need to do this separately for each tier.

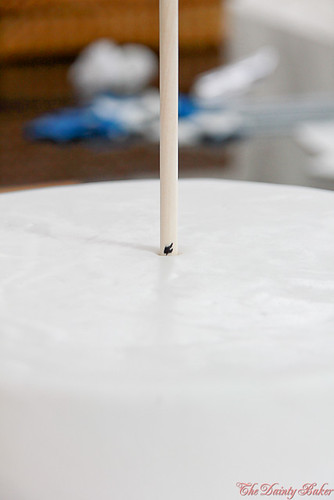
It is important that the middle of the tier will be the main reference point of the height at which you want your tier to be. Therefore, you will need to stick a dowel into the middle of the tier and mark the height as shown below.
Next you will remove the dowel and cut where the line is. Using this cut dowel as your reference, mark the rest of the dowels out the same size. Note always use the original cut dowel to measure and cut the other dowels, this will help you maintain consistency.
When you have finished cutting the desired amount of dowels line them up just to check that they are all the same size. Trust me you do not want to screw this part up or your cake will be the Leaning Tower of Pisa..... bad memories... lol
Step 5: Insert all the dowels in their places and get ready to stack them on top of each other.
I have obviously left the middle out as this will be where the central dowel goes through. If you are not using a central dowel (not necessary for say 2 tiered cakes) then you need to push a cut dowel through there.
Step 6: Spread some buttercream or royal icing on the tier and stack the tier above ontop with the help of a spatula.
Step 7: Using your longer dowel push through the middle of the stack, if it is too hard to push down you can lightly and carefully hammer it down with a mallet or twist the dowel carefully to puncture through the cake board.
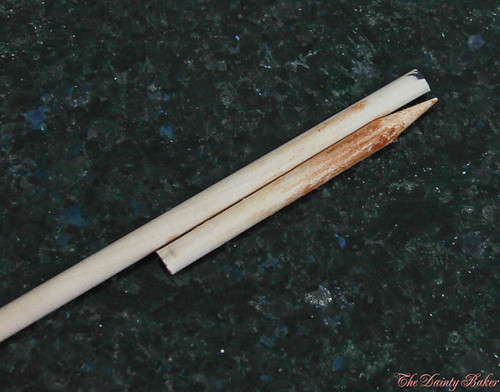
Note: The longer dowels that can be purchased from Bunnings have flat ends unlike the shorter cake dowels. You need this long dowel to have a pointed end so that you can push through the cake tiers and their boards easily. To do this just sharpen the end of the dowel using a pencil sharpener, until you get the end like the cake dowel.
Mark this central dowel as you did with the others, cut it and reinsert the dowel.
Step 8. Voila!! You have your stacked cake!
Now its your turn! :) Good luck and would love to hear how you guys go!
xx

