December 19, 2011

Merry Christmas!!

Its coming to that time again!!! Christmas!!! I love Christmas, all that fuzzy happiness and good cheer, makes me feel all giddy with the Christmasy atmosphere (and I dont mean just because of all the booze!)

This year will be the first time in almost 8 years that I will actually be home in Australia for the festive season, which I'm actually really excited for!! Just thought with all the travelling and stuff this year, it would be nice to actually spend some time at home with all my close family and friends :)

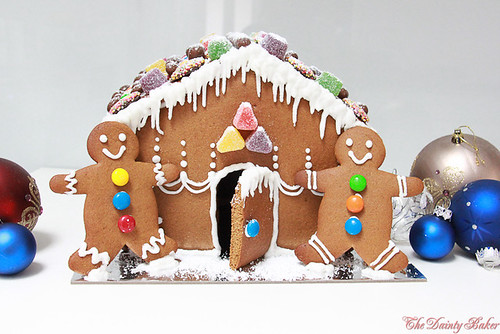
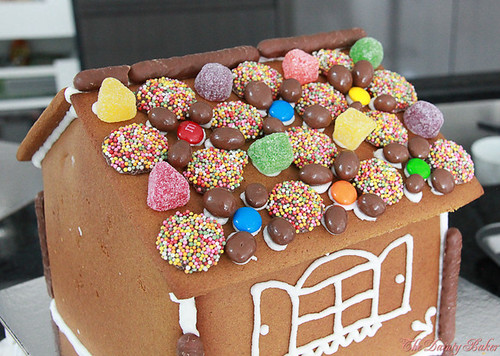
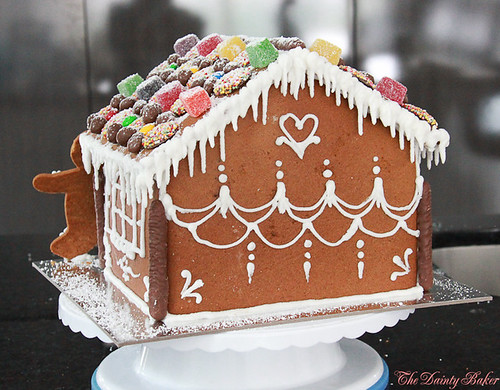
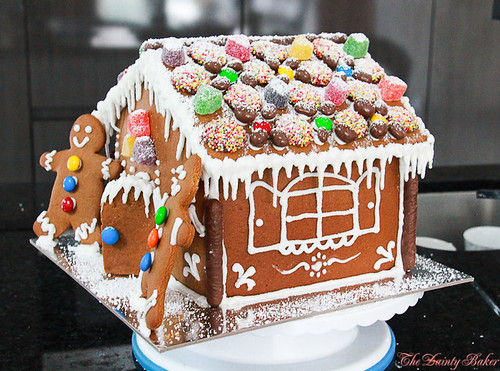
I've been a gingerbread making machine this past week. Never been a huge fan of gingerbread but I couldn't resist because they're so fun to make and look soo sweet and pretty!!

Gingerbread house-18
Gingerbread house-12
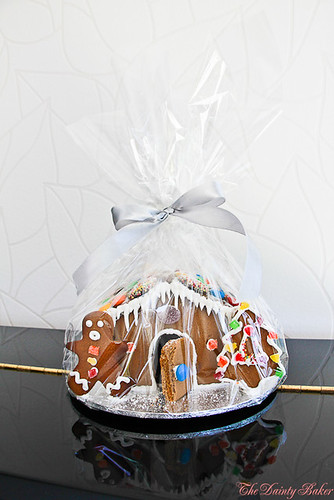
Gingerbread House
Adapted from Christmas Cooking by New Woman's Weekly

Ingredients
4 1/2 cups (675 g) self raising flour
3 tsp ground ginger
2 tsp ground cinnamon
1 1/2 tsp ground clove
1 tsp ground nutmeg
185 g butter, chopped
1 cup (220 g) firmly packed dark brown sugar
1/2 cup (180 g) treacle
2 eggs, lightly beaten

Royal Icing
2 egg whites
3 cups (480 g) pure icing sugar/powdered sugar
1/2 tsp cream tartar
1 tsp lemon juice

Tools
35 cm round or square board
paper or cardboard
Gingerbread house-16
Method
1. Rub all the dry ingredients and butter until it resembles bread crumbs. Add wet ingredients and combine until it forms a dough. Refrigerate for an hr.
2. Cut out shapes for the house; Roof (Qty 2) 12cm x 19 rectangles, Sides (Qty 2) 10.5 cm x 16 cm, Front/Back (Qty 2) 16 cm x 18 cm, trim this so that it forms 11 cm high gables.
3. Preheat oven to 170oC.
4. Roll out the dough between baking paper until approx 5 mm thick. Cut out shapes.
5. Bake for 10 to 12 mins, the cookie will feel soft but firm (it hardens as it cools).
6. To make the door and windows get a sharp knife and cut out the shapes whilst the cookie is still warm.

Royal Icing
1. Sift all the powdered sugar and add the rest of the ingredients
2. Using a paddle mix the ingredients at the lowest speed for about 20 to 25 mins. Note : do not overmix or your royal icing will be very hard to pipe. The consistency should be soft but firm and elastic.

Construction
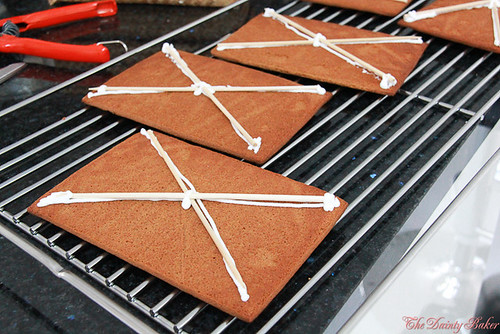
1. You need to do this at least a few hours before building your house, if possible, the day before. Pipe royal icing in an 'x' and place 2 skewers on the roof panels. This will serve as support for your structure.
Gingerbread house-27
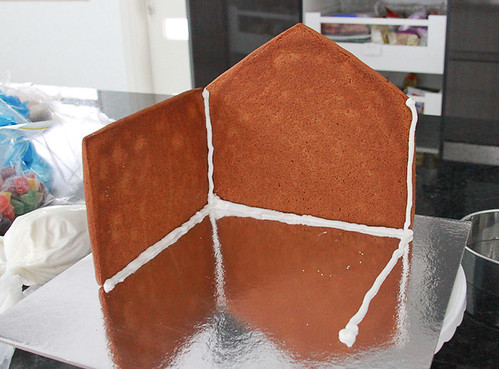
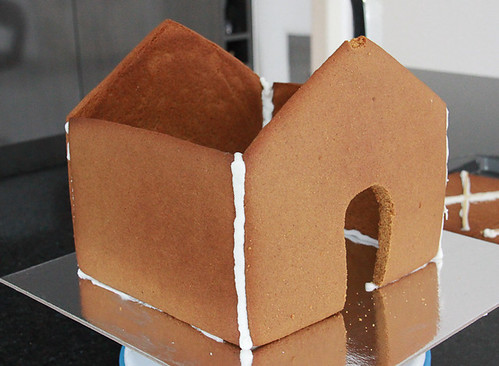
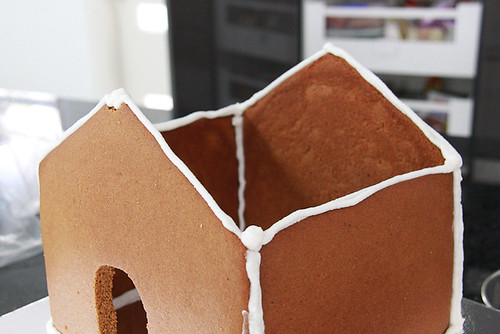
2. Pipe along the edges of the back and one of the side panels and position them together. If it doesnt stay use a prop. Do the same with the other side. Note, how I have piped along the bottom as well.
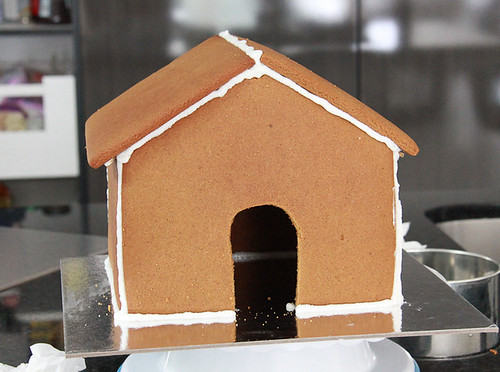
3. Once all the sides are attached, pipe along the top edge and place the roof panels on top.
4. If there is a gap between the side/front and back panels and the roof, fill it in with royal icing.
Gingerbread house-3Gingerbread house-4
Gingerbread house-5Gingerbread house-6
Gingerbread house-7Gingerbread house-8
Looks like my construction roots are still in me... hehehehe
Gingerbread house-20
Gingerbread house-21
After the house is built (and is standing on its own, without any support), you're ready to decorate!! You can use any sweets you like, chocolate freckles, jubes, chocolate fingers, marshmallows ....

Gingerbread house-9
Gingerbread house-10
Gingerbread house-11
Just a note on the recipe; its not a very strong gingerbready recipe so if you want to make it slightly spicier just add more powdered ginger! Also try swapping dark brown sugar with just brown sugar for a sweeter taste... because the royal icing and chocolate etc isnt bad enough for your teeth.

Gingerbread house-17
Gingerbread house-14
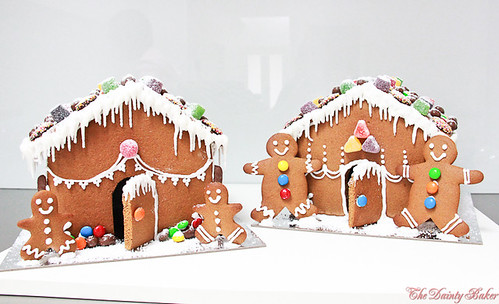
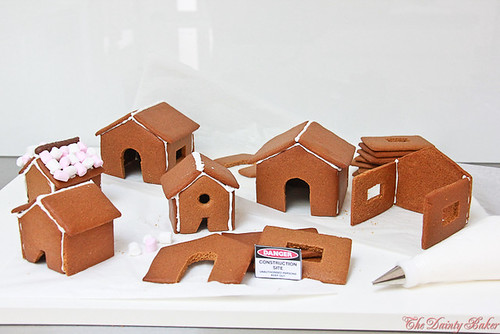
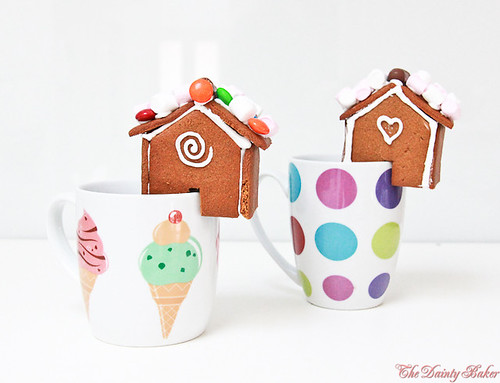
Whilst I was Pinteresting I came across an idea on a website that was UUUUUUBBERRRRR cute!! So I decided to make my own!
Gingerbread house-26
Gingerbread house-22

All of these make some really cute gift ideas for Xmas too!! :)

Gingerbread house-28
Gingerbread with your tea?
Gingerbread house-2
Mini Gingerbread house

Sad to say but, this is going to my last post of 2011 :( Its been a massive year, dunno about you guys but I will be welcoming the new year with open arms! :)

And... before I sign off, I just wanted to wish you all a....

Gingerbread house 3
and a Happy New Year!! See you all in 2012!!!

December 6, 2011

How to Assemble a tiered cake

Cake stacking can be pretty scary. So I have decided to share with you what works for me! All you really need is; the right tools and some guts! :)

Cake stacking-12

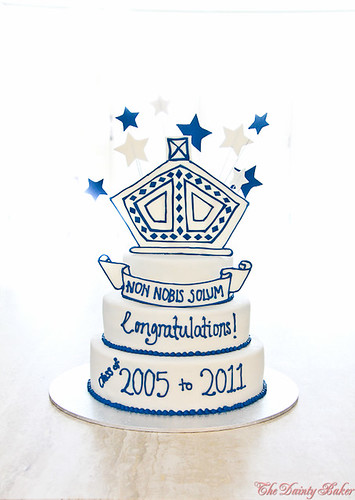
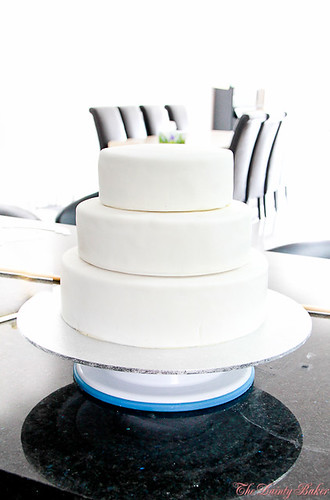
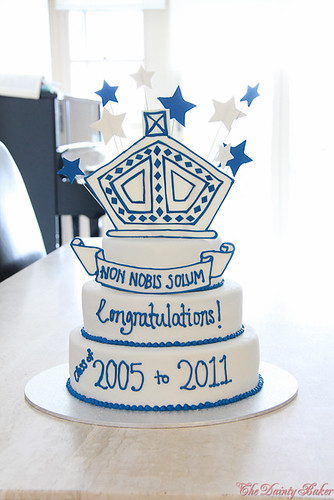
I will show you step by step how I stacked this three tier cake I made for my brothers Valedictory dinner.

Step 1: Prepare all the tools you will need.

Cake stacking-2

This will include:
- Wooden dowels - you can buy these at cake stores, they are usually only 30 cm long (see pic) or you can also go to Bunnings and get their wooden dowels approx 5-8 mm in diameter, these are like 1 m long. Note - you will need 1 longer central dowel to go through the total height of the cake.
- Wood cutters (or something similar to cleanly cut the dowels)
- Buttercream/royal icing
- spatula (always handy)
- mallet (optional)

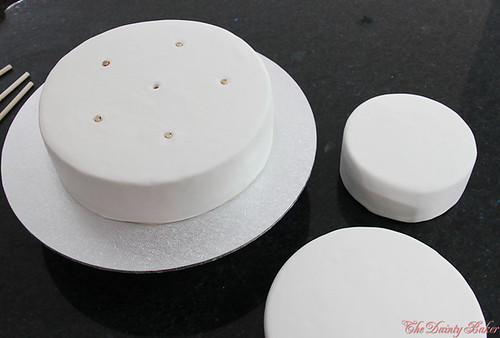
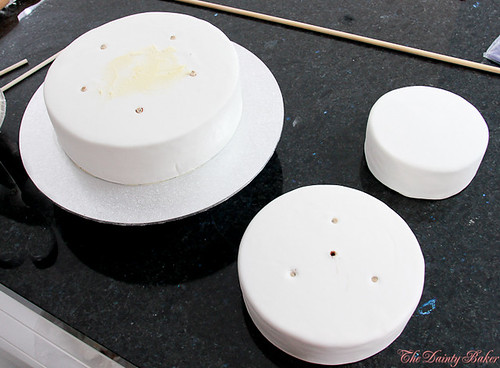
Step 2: Have your cake tiers prepared and ready to stack.

Cake stacking-1

It is up to you how you want to finish/decorate your cake i.e. buttercream or fondant etc (possiblities are endless), but make sure that each tier except the bottom is sitting on a foam or cardboard cake board. The bottom tier should be placed on a sturdy wooden cake board or surface that wont bend and will take the total weight of the finished cake. Usually this can be achieved by thicker cake boards not necessarily larger.

Step 3: Figuring out how many dowels to use per tier
I like using odd numbers. So for my 10 inch round cake I have got 5 dowels, the 8 inch round I have 3 dowels and obviously there are no dowels in the top tier. I have a central dowel through all the tiers to stop the tiers from sliding.

Honestly, there isnt really a science to how many dowels to use per tier. But I have found that these numbers work and if you are worried about the structural integrity you can always shove a few more dowels in there for piece of mind. The only thing to remember and keep in mind is that no matter how many dowels you use, just make sure that they are even spread so that the load is evenly distributed. Also, I'm being 'Captain Obvious' here but, the lower and larger tiers will need more dowels than the tiers above as it is supporting the weight of those above, just needed to say that. Oh and do not go crazy and put dowels too close to the edge or outside of where the tier on top as 1. it will show when you stack them and 2. its redundant as it isnt supporting anything.

Step 4: Measuring out the dowels
You will need to do this separately for each tier.

Cake stacking-3

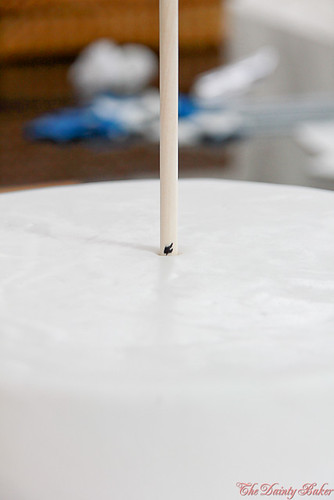
It is important that the middle of the tier will be the main reference point of the height at which you want your tier to be. Therefore, you will need to stick a dowel into the middle of the tier and mark the height as shown below.

Cake stacking-4

Next you will remove the dowel and cut where the line is. Using this cut dowel as your reference, mark the rest of the dowels out the same size. Note always use the original cut dowel to measure and cut the other dowels, this will help you maintain consistency.

Cake stacking-5

When you have finished cutting the desired amount of dowels line them up just to check that they are all the same size. Trust me you do not want to screw this part up or your cake will be the Leaning Tower of Pisa..... bad memories... lol

Cake stacking-6

Step 5: Insert all the dowels in their places and get ready to stack them on top of each other.

Cake stacking-7

I have obviously left the middle out as this will be where the central dowel goes through. If you are not using a central dowel (not necessary for say 2 tiered cakes) then you need to push a cut dowel through there.

Step 6: Spread some buttercream or royal icing on the tier and stack the tier above ontop with the help of a spatula.

Cake stacking-8

Cake stacking-9

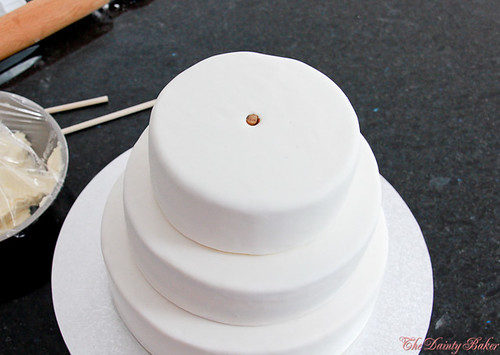
Step 7: Using your longer dowel push through the middle of the stack, if it is too hard to push down you can lightly and carefully hammer it down with a mallet or twist the dowel carefully to puncture through the cake board.

Cake stacking-10

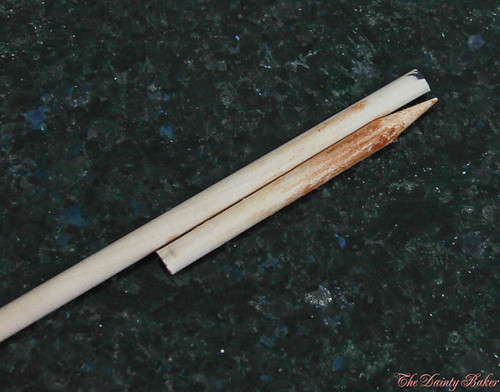
Note: The longer dowels that can be purchased from Bunnings have flat ends unlike the shorter cake dowels. You need this long dowel to have a pointed end so that you can push through the cake tiers and their boards easily. To do this just sharpen the end of the dowel using a pencil sharpener, until you get the end like the cake dowel.

Mark this central dowel as you did with the others, cut it and reinsert the dowel.

Step 8. Voila!! You have your stacked cake!

Cake stacking-14

Cake stacking-13

Now its your turn! :) Good luck and would love to hear how you guys go!

xx

November 23, 2011

I'm Back!!!

So, I'm back from the USA!! :) What can I say? It was an experience both of good and bad. Being away made me realise just how much I missed home and all the little things we take for granted. Cliche, I know, but too true.

In summary, I left home wanting to take on the world, travel and learn as much as I could in the 6 months I was in school. I wouldnt actually say that I did take on the world but I sure coped a beating from it.

I was admitted to hospital twice, lost $4k due to the Hilton having the worst security ever (which they of course did not take responsiblity for), lost my passport, flew home for a funeral and back again which in turn stuffed up my visa, had issues selling my car because the dealer had been shady and there was a typo regarding the amount of mileage on the title and most recently, the new Kitchen Aid that I had bought and blinged up "popped" which lead me to finding out that we cant use USA bought kitchen aids in Australia because the US are one of the only ones in the world that runs on 110V and 60Hz...... anyyways! Thank goodness this year is almost over and thank God I've made it home in one piece.

Having said all these downers there have been good times! I was fortunate enough to go to the Bahamas, travelled around pretty much the whole of the East Coast of USA and I ticked off what I wanted to do most, which was learn to bake professionally. It feels almost weird being back and not being in a 'commercial' kitchen everyday. I have also been lucky enough to meet some amazing people whilst I've been away and formed friendships that will hopefully last a lifetime :)

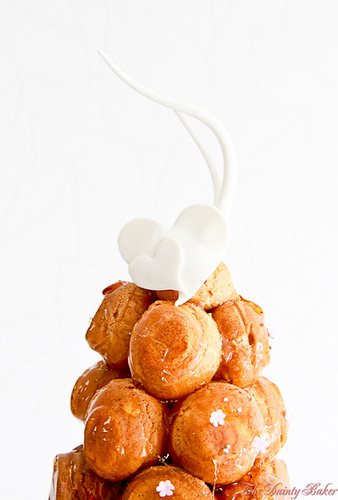
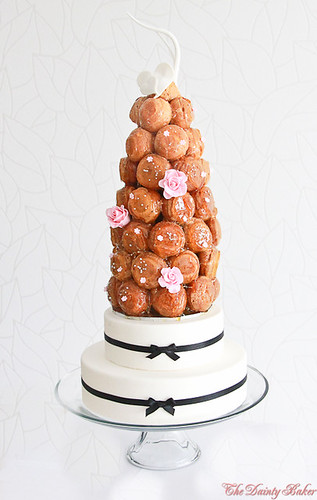
So what have I been doing since I've been back? Why, baking of course!! :) I realised that alot of the things we learnt in school needed to be refreshed, especially since I was replicating the recipes in my home kitchen. My first proper project was the Croquembouche Wedding Cake.

Croquembouche wedding cake-13

Croquembouche wedding cake-15

The swirl decorations are made out of pastillage, which is a sugar dough that dries really hard. I had the recipe for it but as it was only demonstrated to us in school and I came across a premix for it, I decided, 'why make life hard for myself?' and went with the premix. The premix is from a company called Cake Art. It comes as a powder form and you need only add water. It was really really sticky at first so I added some more of the powder, then after letting it sit for a few minutes you were able to knead it until it was elastic. It was still a really soft dough. The pastillage when demonstrated at school pretty much dried up instantly but this premix stuff takes a while to dry, you need to let it sit overnight or even a few days depending on its thickness.

Croquembouche wedding cake-11

Croquembouche wedding cake-6

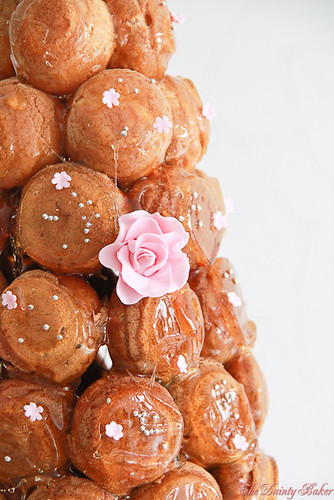
The roses and small blossoms were made out of gumpaste. I used the brand Satin Ice. The gum in the gum paste allows it more flexiblity and stretchablity so that you can roll out the dough very thin without it ripping, therefore creating more life like flowers.

Croquembouche wedding cake-8

Croquembouche wedding cake-5

I've always had problems with using sugar and ever since I took sugar class at school my confidence was boosted with being able to blow and pull sugar. HOWEVER! Alas my old enemy is back! I had the same problem of the sugar melting on my croquembouche. I dont know if its because of the blasted few days of torrential rain we've been having lately that has saturated the atmosphere with moisture or that my method of cooking sugar is incorrect? I even used the sugar casting recipe that Chef Notter uses for his show pieces for the sugar on the pate a choux but it still melts!! If anyone out there knows the solution to my problem PLEASE! email me I would love to hear from you!

Croquembouche wedding cake-12

October 3, 2011

Fancy Schmancy Kitchen Aid

There was something at the top of my hit list for coming to the States. And that was to get me a brand spanking new mama Kitchen Aid mixer for the baby Artisan mixer I have at home.


Of course I opted for the newest, biggest, baddest kitchen aid they had to offer. The Kitchen Aid Pro 600 series. This beauty not only has a bigger capacity than the baby at home but is also more powerful. I was hoping to get a baby blue colour to supplement my baby pink one at home but of course this bad ass doesnt come in all the pretty colours we so much desire (I suppose it wouldnt really be prudent for professional chefs such as Gordon Ramsey for example to have a flaming pink professional mixer in his kitchen).

Anyhows, after much debate I went for the black coloured one (mostly because they didnt have the red one and I couldnt be bothered to wait for shipping!). Looking at my mixer one day, it was sleek, it was sexy but there was something missing. 

So.... after much internal dilemma, I decided to pimp my mama ;)


Isn't she so pretty?? It was pretty easy to do. You just need to clean the surface really so that there's no dirt or dust on it then stick on the gems. I bought these cool sticky gems from MichaelsHope they don't come off too easy though :)


Coincidently, about a week later the lovely ladies aka Fantastic Four, were graduating from school. So we decided to give them a little graduation gift. I got really excited and creative, so volunteered to put something together for them on everyones behalf.


It took me ages!! I stuck the jewels on one by one with super glue and I almost stuck my fingers together too LOL!
Even the Chefs liked the pressies!


Congratulations to R, E, S & E on finishing!! Wish you guys the best of luck! We'll miss you! x


LinkWithin

Related Posts Plugin for WordPress, Blogger...