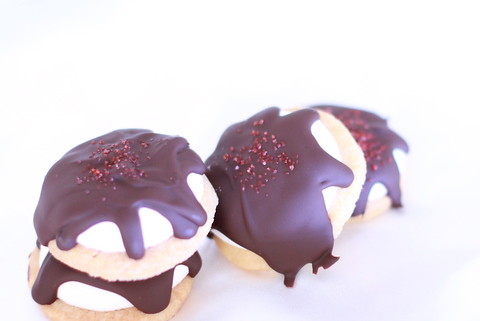
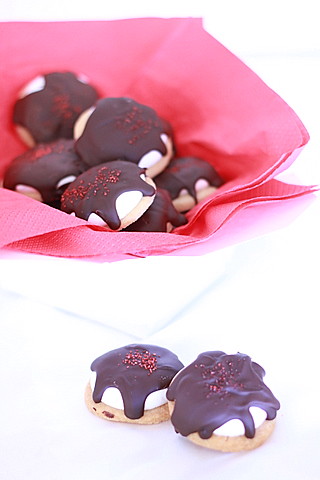
Since I'm always in the mood for a challenge, I decided not only to replicate these little chocolate goodies but I also attempted to make marshmallow for the very first time!! I thought it would be really difficult and didn't really know where to start to be honest but after scrounging around the web a little it was easy enough for me to find a recipe from the Martha Stewart website.
Without further ado, I present you with my rendition of the Royal...
Minty Royals
1 quantity marshmallow
1/3 quantity of the biscuit base
100g Lindt Mint Intense
Coloured sugar (Optional)
Marshmallow
2 1/2 tsp gelatin
1/3 cup cold water (gelatin)
1/4 cup water (syrup)
1 cup sugar
In the bowl of an electric mixer, sprinkle gelatin over the water and let stand until the gelatin softens (should be about 5 mins)
In a small saucepan, combine the other quantity of water with sugar and stir on medium-high heat until all the sugar is dissolved. Stop stirring once the sugar is dissolved (otherwise it'll crystallize into a sugary mass instead of being a nice thick syrup). Brush the sides of the pan down with cold water to dissolve any sugar crystals which might have splattered up onto the sides. Boil the sugar until it reaches the soft ball stage (115oC). Remove syrup from heat.
Pour the syrup into the gelatin and hand whisk to dissolve the gelatin into the syrup.
Next, beat the mixture using the whisk attachment until soft peaks form (should look like meringue).
Use immediately by either pouring into a greased tray or transfer into a piping bag fitted with a nozzle (nozzle size depends on how big you want your marshmallows!)
Biscuit Base
2 cups all-purpose flour
1/2 teaspoon baking powder
1/2 teaspoon salt
3/4 cup unsalted butter, softened
1 cup sugar
1 large egg
1/2 teaspoon vanillaTo Assemble
Allow the freshly baked biscuit bases to cool on a cooling rack, then pipe enough marshmallow to cover the rounded discs. Let the marshmallows set, about 30 mins (they will still be quite sticky when touched but pulls back when stretched).
Melt the chocolate (I usually do this in the microwave using a DRY ceramic bowl for 10-20 sec at a time ...or you could be more professional and use a bain marie)
Next place another tray underneath the cooling rack lined with baking paper (this will catch the chocolate that dribbles off the cookies)
Cover the marshmallow cookies with the chocolate and sprinkle with sugar (if using). Let the chocolate set.
Bon Appétit! ♥


That is SO clever! I love Royals (the dark choc ones). Your recipe is also a good reason to try and make marshmallows. Thanks!
ReplyDeleteooh ive never had royals but these look cute! i have the urge to sprinkle them with 100's and 1000's hahaha
ReplyDeleteSo cute! That might be the easist marshmallow recipe I've ever seen. Great photos btw :)
ReplyDeleteAll thanks to Billy from ATFT! I went to his photography workshop on the weekend, it was really good I picked up some pretty good tips from him! :)
ReplyDeleteWhen I first met Rhonda in prison I had no idea she had such a talent for cooking (mainly because we didn't really have the time to cook, or the utensils).
ReplyDeleteIt's great to see her follow her passions, not that she is out of the joint.
I was lucky enough to sample one of these Mint Royales the other day - it was ridiculously good. Keep up the good work mate!
sorry, I meant *now* she is out of the joint
ReplyDeleteYour photographs are beautiful! Love your marshmallow recipe!
ReplyDeleteahhh no more yellow tint... ;) gorgeous photos Rhonda :) Im glad you learned something from the workshop.
ReplyDeleteThese are so pretty! Splodges of chocolate always look so adorable :)
ReplyDeleteaww so cute! I love replicating store bought treats at home. This is fantastic!
ReplyDeleteVery cute and great job on making it work! Glad to have found your blog (I came over via Almost Bourdain)
ReplyDeleteThese sound incredible!! Just the thought of chocolate and marshmallow is good enough! Almost reminds me of a s'more!
ReplyDeleteWould you mind checking out my blog? :D http://ajscookingsecrets.blogspot.com/
Oh man this looks delicious!
ReplyDeleteEverything here looks so yummy! And your photographs are beautiful.
I recently launched my own blog www.prettygoodfood.com I'd love for you to check it out and let me know what you think! Thanks and Happy Cooking!