August 31, 2010

Graduation & Cupcakes!

Graduation-9

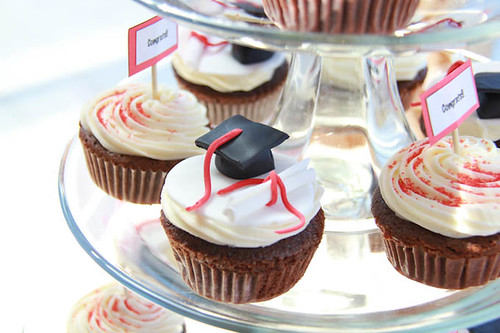
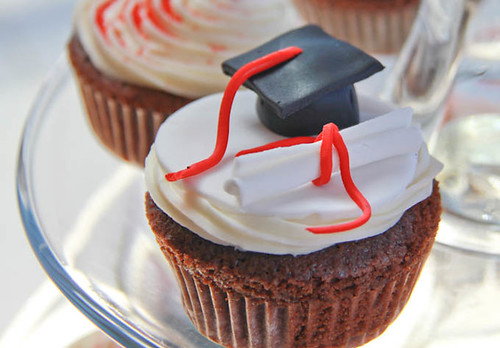
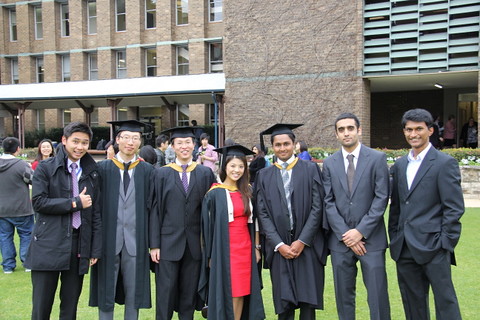
So, after 5.5 grueling years at uni and endless semesters staring enviously at people in their graduation gowns and mortarboards, smiling joyeously that 'they've made it', it was finally my turn. I was so jittery, nervous and to some extent even sad. The truth that another chapter of my life has ended and a new, scarier and more challenging one is yet to open, really hit me hard. How did I deal with all this emotional turmoil? ... Bake cupcakes of course - Graduation ones!!

Graduation-6

Graduation-5

Graduation Cupcakes
Graduation toppers
1 packet Orchard White Icing (ready made/ready to roll fondant)
Black & red food colouring (I used Wilton colour pastes)

Frosting - I was lazy pushed for time, so I used Betty Crockers: Ready to Spread Creamy Deluxe Vanilla Frosting

Chocolate mud cakes
Makes 12
Adpated from Easy Cupcakes by Colour by AWA

60g Milk Chocolate, chopped coarsly
2/3 (160ml) cup water
90g butter, softened
1 cup (220g) brown sugar, firmly packed
2 eggs
1 cup self raising flour
2 Tbsp cocoa powder
1/3 cup (40g) almond meal

Graduation-10

Preheat oven to 170oC. Line 12 hole muffin pan with paper cases

Stir chocolate and the water in small saucepan over low heat until smooth.

Beat butter, sugar & eggs in a small bowl with an electric mixer until light and fluffy. Stir in sifted flour and cocoa, meal & warm chocolate mixture. Note: If the mixture is really liquidy you can let it stand for 15 mins or so, the mixture should thicken, which should make it easier to spoon into the pans.

Drop 1/4 cup of mixure into the muffin cases. Bake for about 25 mins or until the tops spring back with a touch. Stand cakes for 5 mins before turning top-side up onto wire rack to cool.

To decorate:
Pipe or spread the frosting onto the cupcake, ensuring that the top is flat.

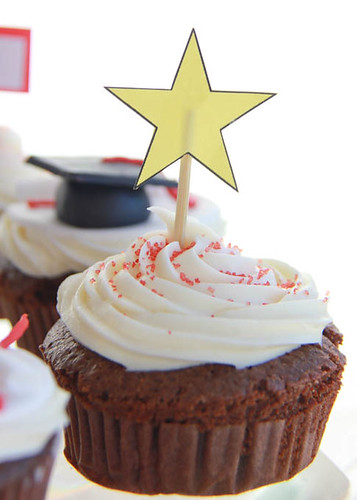
Next, place the cupcake topper on top of the frosting.

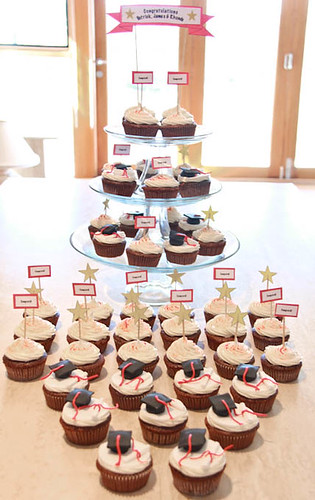
Voilà! Your very own cute graduation cupcake!

Enjoy! Bon Appétit ♥

Graduation-2

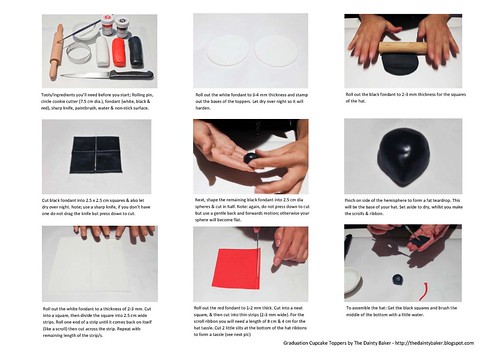
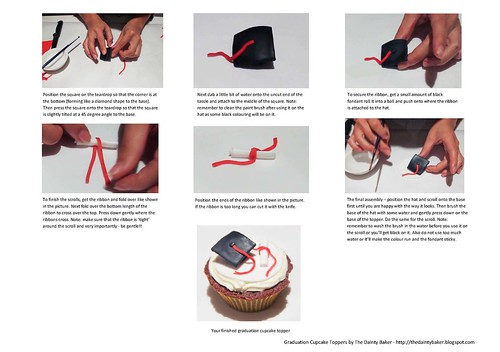
See below for instructions on how to make your own graduation cupcake topper! Or download the printable version here!

Graduation Cupcake toppers_Page_1

Graduation Cupcake toppers_Page_2

Graduation-12


Graduation-14

August 26, 2010

Mauritius & Seychelles

Hi Everyone!! I'm BACK!!!

Firstly, I just wanted to say a big 'Thank You' to to everyone for all your well wishes, very sweet of you all.

Secondly, I do apologise for taking so long to get this post up, been trying to figure out how to use Lightroom, Photoshop etc and its made me realise how technology illiterate I can be!

Thirdly, because I have taken soooo many pictures I've decided to only upload my top favourites and to showcase the other select few in a slideshow.

So for all you who do not know where Mauritius and Seychelles is (don't worry I have been asked by alot of people - geography was never my strong point either), its off the coast of Africa, near Madagascar (meet the pansies!). The flight took close to 13 hours (5 of which was spent crossing Australia) going there but coming back it was only 10 hours, both flights we had to transfer at Reunion Island, which is also a lovely little island in the Indian Ocean.

Mauritius is one island, whereas Seychelles is made up of many smaller islands (Mahé, Praslin & La Digue are the main ones). We only got to visit Mahé in the Seychelles which was a bit of a bummer. Both Mauritius and Mahé were very small. To give you an idea of exactly how small the islands were, it only took 1-1.5 to get from the South of Mauritius to the North (via the red line/freeway shown below) in non peak traffic, as the freeway runs straight through Port Louis (capital) and traffic can get pretty foul in the morning for peak hour traffic, yet for the same time, you could circle the entire island of Mahé.

Map courtesy of Africa Maps

They have the same seasons as us, so its currently winter over there but the weather was great! The average temps were about 23-25oC in Mauritius and in Seychelles it was 25-28oC. The only bad thing is it would get quite cloudy at times and even rain but in the next hour or so it would clear up and become sunny again which was awesome. The currency used in Mauritius is the Mauritian Rupee (MUR) exchange rate was about MUR 36 to A$1 and in the Seychelles its Seychelles Rupee (SCR), SCR 10 to A$1 when we went. In Seychelles they also accept Euros.

Now I know you're all wondering what kind of FOOD do they have there?? Well the Mauritians and Seychellians (??) traditionally eat Creole food. For me it was kind of like a mix of Indian, Chinese, African & French food. Fish was usually on the menu but they also had a lot of chutneys/pickled vegies also to go with, eggplant & squash were also quite common. I tried their Creole sauce, which was a tomato based sauce with vegies, it was very nice. The food was very flavoursome as they use lots of spices (cinnamon, cloves, nutmeg, chilli) that are readily available on the islands. Pizza was also a favourite over there, it seemed to be served nearly at every restaurant we were at! For me, Mauritius had better food than Seychelles. There was more variety and OMG! the fresh water prawns we had at Grand Bay were so big we mistook them for lobsters!! (see slideshow)

Our trip was broken up into 3 parts, Mauritius staying at Belle Mare (East Coast) then Seychelles then back to Mauritius (staying in the north at Grand Bay, literally where the red line ends at the top).
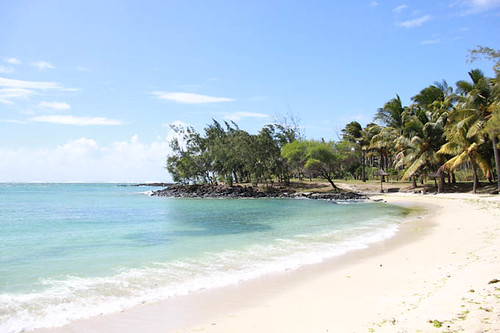
Mauritius-11
Belle Mare Beach, Mauritius

The accommodation that we had was excellent! The first place we stayed at was a resort called the Belle Mare Plage. This resort is located in the more secluded part of the island, there weren't many shops or restaurants within walking distance from it but you didn't need it when most of the meals are included. You have the choice of half board (breakfast & dinner) or full board (B, L, D), usually I don't like to have meals included with the accommodation coz its usually pretty average but I was thoroughly impressed with the service and food that was served at the Belle Mare. Breakfast & dinner were buffet style, except much classier because as well as the precooked foods (roasts, desserts) that were served, there were also chefs at other stations cooking things fresh for you too. They had a pasta, pizza, Chinese cuisine, Creole cuisine and Salad Chefs. Dining there was truly heavenly... no wonder I've gained a few kgs!!
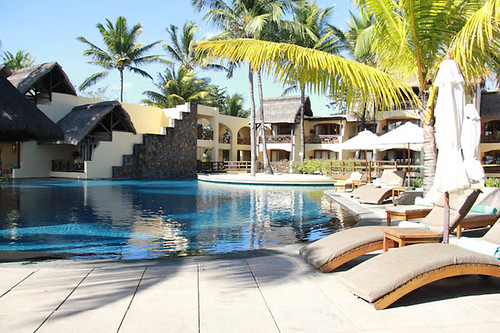
Mauritius-10
Poolside at Belle Mare Plage, Mauritius
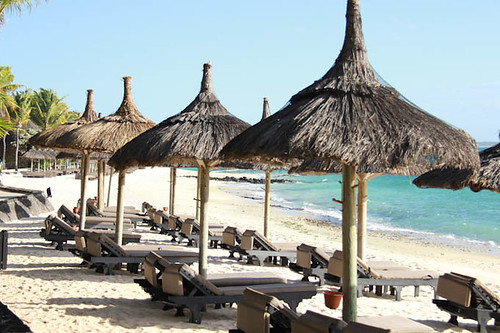
Mauritius-2
Beachside at Belle Mare Plage, Mauritius

Also unlike a lot of the other places I have visited, the generosity was amazing, in addition to the usual free stuff (gym, spa, pools) most water sports activities there were also free of charge e.g. snorkeling gear, glass bottom boat rides, kayaking, water skiing, they even offered lessons in snorkeling and water skiing on certain days!! Its perfect for honeymooners or people who like to relax and take it easy on a vacation, very club med style. To top it off it wasn't too expensive either worked out to cost approx $200 pp/day including the transfer to and from the resort.

Mauritius-92
Belle Mare Plage, Mauritius

On the other hand, when we came back to Mauritius we stayed in Grand Bay (Grand Baie as they spell it). This part of Mauritius was much more lively, with stores and restaurants along the beach. It was here that I was able to try some of the local foods/restaurants outside of a hotel/resort setting, which is what I love to do in a foreign country! However, it was much more touristy than Belle Mare and I have to say that the beaches were not as beautiful because I found it was a little too crowded.
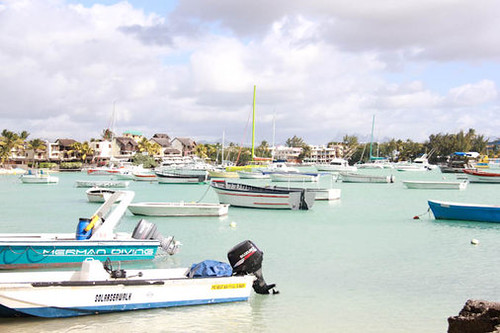
Grand Bay
Grand Bay, Mauritius

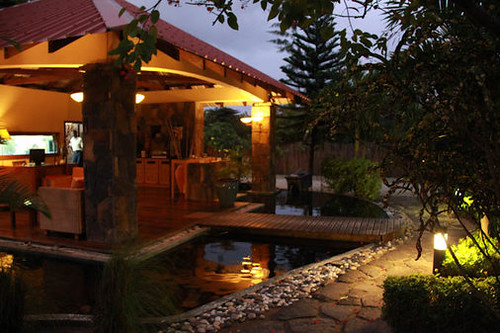
The place we stayed at in Grand Bay was a boutique hotel called Ocean Beauty, although it was small, the place was very nice and the service felt very personalized. The room we had felt like we had our very own small villa to ourselves. Every morning we had the choice of getting breakfast on the balcony in our rooms or served to us on the beach. They also had complimentary internet access and drinks (inc alcohol) available at the lobby. If you are looking for a good deal, I would definitely recommend this place. It's highly affordable yet still offered (in my opinion) 4 star rating facilities ($190 per night for 2 persons).
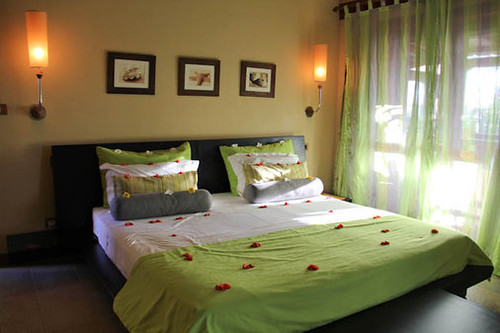
Ocean Beauty 4
Our Room, Ocean Beauty - there were pretty flowers decorating the entire room when we arrived. It was such a nice little touch!
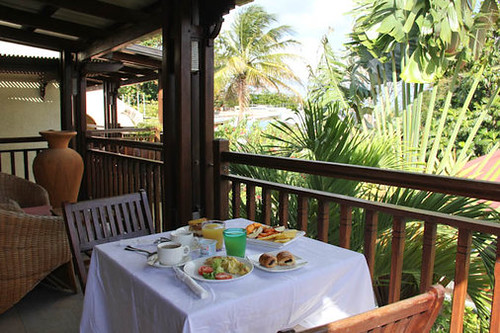
Ocean Beauty 3
Breakfast on the Balcony @ Ocean Beauty
ocean beauty 2
Lobby, Ocean Beauty

Here are some of the photos of the things we did when we were in Mauritius:
Mauritius-48
Seven Coloured Sands of Chamarel, Mauritius - truely amazing, we also got to see the Chamarel waterfall (pics in the slideshow)

Mauritius-37
I'le aux Cerfs (Island of the Deer), Mauritius - it had incredibly white sand, very commercialised though
Mauritius-32
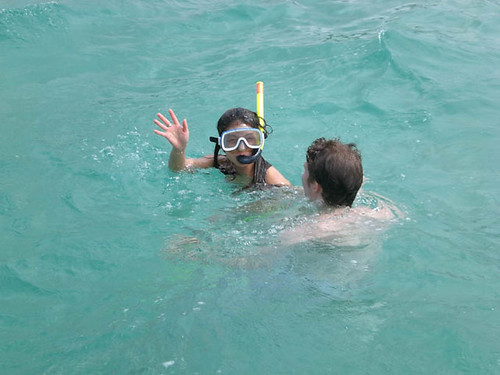
Snorkelling in the Indian Ocean, Mauritius - stupidly I am NOT a strong swimmer, the water was deep and I did not wear a life jacket... thank goodness the Log was there to keep me from drowning!

Mauritius-31
Parasailing, Mauritius - would definately recommend it. It cost €45 (A$70) for 2 persons.

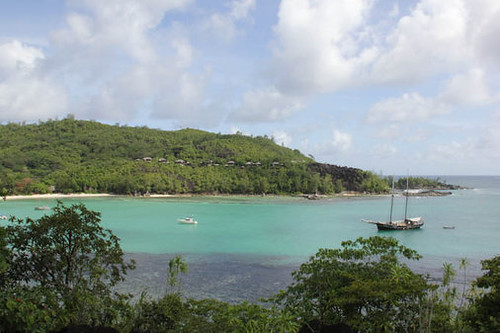
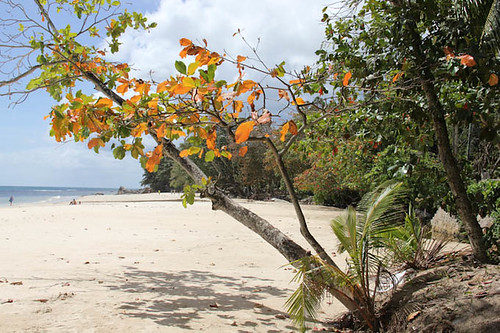
The Seychelles was absolutely stunning!! Hands down I have to say that their beaches were better than any other beach I have ever visited. The water was warm, the sand so soft and unspoilt. There were beaches along all the coast of the island, some inaccessible though. Mahé was very tropical, it was mountainous, lush and green with fantastic cliff faces that dropped straight into the ocean. The island had incredibly windy and narrow roads, which made driving around quite scary at times.

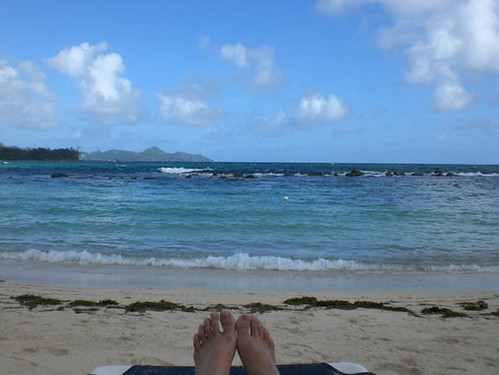
The capital of Seychelles is Victoria, it is a very small city town. There's a main market which sold fresh produce as well as local spices. There weren't many shops, however there were lots of little "milkbars" scattered across the island. Accommodation in the Seychelles was slightly more expensive than Mauritius. We stayed on the west coast at Le Meridian Barbarons, out of all the hotels, this was probably my least favourite. It was older than the other hotels we had stayed at, however the service was still great. The lagoon that Le Meridian was situated next to was beautiful, there was a sectioned off area for swimming as the main beach could get quite rough. For Seychelles we took a slightly different approach, we didn't join any tours but decided to hire out a car to travel around by ourselves and discovered many of the beaches/places on our own.

LE Meridian Barbarons
Lobby, Le Meridian Barbarons
Lagoon
Lagoon, Le Meridian

Here are some of the magnificient places we went to visit in Mahé, Seychelles.
Mauritius-124
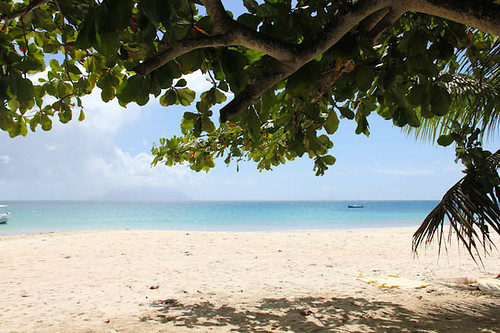
Beau Vallon Beach, Seychelles - this is probably the beach where most tourists go.
Mauritius-123
Beau Vallon Beach, Seychelles

Mauritius-120
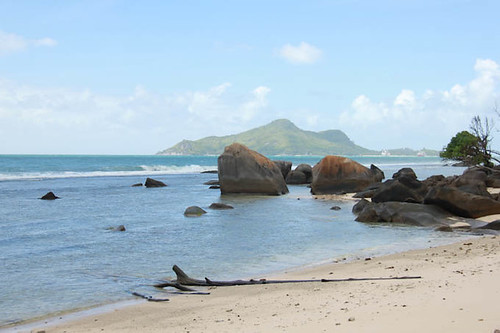
Beach near Bliss Hotel, Seychelles - magnificently pristine! Gorgeous little beach home to many crabs, the Log caught me one!! It was tiny, so cute!
Mauritius-114
Beach along the road in Seychelles

Mauritius-113
Victoria Markets, Seychelles

Mauritius-110
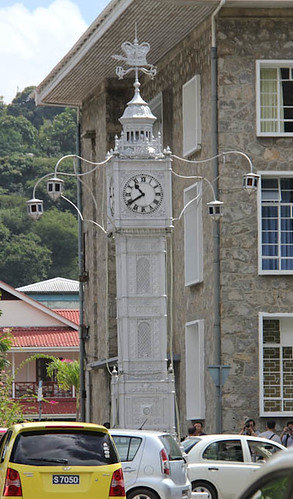
Town Centre, Mahé, Seychelles

Port Launay
Port Launay, Mahé, Seychelles

Mauritius-95
Sunrise in the plane flying to Seychelles

It was such a lovely experience! Great get away from the hustle and bustle to relax and truly indulge. If any of you get the chance I would definitely recommend it and feel free to email me if you have any questions or queries, especially if your planning your next trip there, would love to help out ;)

Your pictures and fotos in a slideshow on MySpace, eBay, Facebook or your website!view all pictures of this slideshow

August 6, 2010

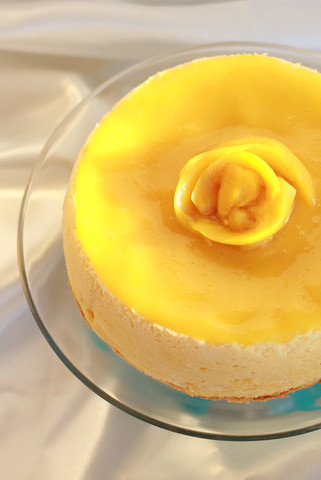
Mango Japanese Cheesecake

The Log and I are jetsetting off to Mauritius and Seychelles on holidays as of tomorrow!! YAY!! I am sooo excited!!! Looking forward to the beach, the tropicalness and the warmth of the sun!!!

As I will be VERY busy RELAXING and doing any water sports I can get my hands on (windsurfing here I come!), there will be very limited, if any, blogging for the next 2 weeks. So to bid you adieu, here is a little slice of summer until I get back x


This cheesecake is so incredibly soft and light unlike the typical New York cheesecakes or denser baked cheesecakes. Surprisingly, the mango miroir is also really easy to make! So, although the cheesecake tastes great on its own, don't be lazy and give the glaze a go, its well worth that little bit of extra effort!

Mango Japanese Cheesecake

Cheesecake
140g Sugar
6 eggs (separated)
1/4 Tsp cream of tartar
50g butter
250g cream cheese
100 ml Milk
1 Tbsp lemon juice
60g Flour
20g Cornflour (cornstarch)

Mango Miroir Glaze
1 tsp gelatin powder
1 tsp hot water
1/2 cup Mango puree (fresh or tinned - although I prefer fresh)
1/4 cup sugar (if you are using fresh mango, if you are using tinned then theres no need as it should be sweet enough)

Preheat oven to 160oC, line or grease an 8-inch round cake tin.

Melt cream cheese, butter and milk in a saucepan over medium high heat. Cool the mixture. Fold in the flour, the cornflour, egg yolks, lemon juice and mix well.

Whisk egg whites with cream of tartar until foamy. Add in the sugar and whisk until soft peaks form.

Add the cheese mixture to the egg white mixture and mix well. Pour into cake tin.

Bake cheesecake in a water bath for 1 hour & 10 minutes or until set and golden brown.

Whilst the cake is baking, make your mango miroir glaze. Dissolve the gelatine in the hot water (make sure its all thoroughly dissolved or you won't have a smooth glaze). Add the puree (plus sugar if using) and mix until very smooth & slightly thick.

Remove cake from oven and let cool on a wire rack. Once cooled, transport the cake onto a serving plate.

Spoon a few tablespoons of the glaze onto the middle of the cake then using the back of a spoon slowly spread the glaze out to the edges of the cake. If you need more glaze, again, start from the middle and spread outwards.

Bon Appétit ♥


Remember to keep on caking and I shall be back soon enough to share with you all my culinary conquests through Mauritius & Seychelles x

August 3, 2010

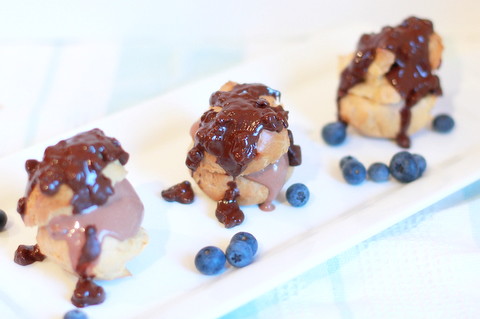
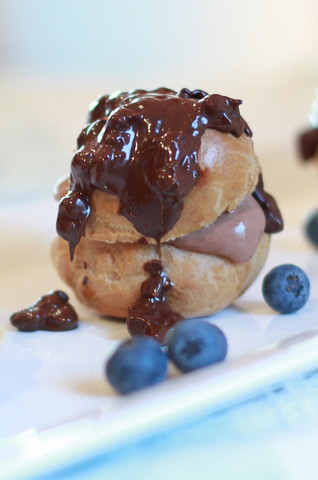
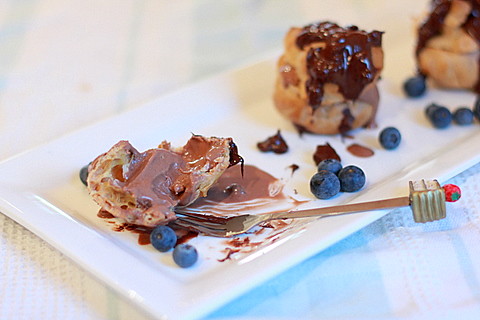
Blueberry & Chocolate Icecream Profiteroles

The weather on the weekend was so beauuuutttiiifull ... it just reminded me how much I missed summer and how much I hate winter! So to make the summery feeling last I decided to make some icecream!!! ...more specifically profiteroles filled with icecream!! (Just like the Beard PaPa icecream puffs I had in Japan last summer... OMG! *faints with delight*)


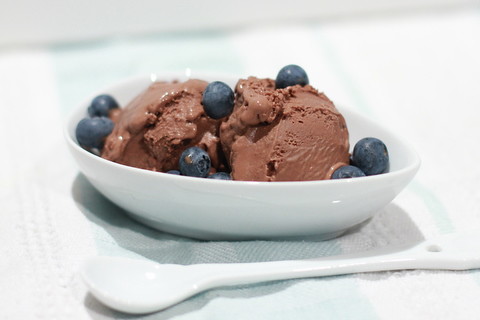
The icecream recipe I used was based on the Chocolate icecream recipe in David Lebovitz's The Perfect Scoop, except, instead of using normal chocolate as it calls for in the recipe, I decided to substitute with Lindts' Excellence range: Blueberry Intense. I'm not usually a chocolate block eater but boy this block of chocolate is ... wonderful!! The blueberry flavour really comes through the rich darkish chocolate with some almonds for texture and crunch. It's good.

Blueberry & Chocolate Icecream Profiteroles

1 quantity of Blueberry & Chocolate Icecream
1 Quantity of Profiteroles
200g Lindt Blueberry Intense Chocolate
1 punnet fresh blueberries (Optional)

Blueberry & Chocolate Icecream

2 cups (500ml) heavy cream
3 tbsp unsweetened Dutch-process cocoa powder
140g Lindt Blueberry Intense chocolate
250ml whole milk
3/4 cup (150g) sugar
Pinch of salt
5 large egg yolks

Warm half of the cream with the cocoa powder in a saucepan, whisking to thoroughly blend in the cocoa. Bring to the boil, reduce heat and simmer at a low boil for 30 sec, whisking continuously.

Remove from heat, add chocolate and stir until smooth. Then stir in the remaining cream. Pour this mixture into a large bowl scraping saucepan as thoroughly as possible.

Next warm the milk, sugar and salt in the same saucepan. In a separate bowl, whisk together the egg yolks. Slowly pour the warm milk into the egg yolks, whisking constantly.

Pour the egg mixture back into the saucepan and stir constantly over a medium heat with a heatproof spatula, scraping the bottom as you stir, until it thickens and coats the back of the spatula.

Next, strain this custard over the chocolate mixture and stir until smooth. Place in an ice bath and keep stirring until cooled, then thoroughly chill in the fridge.

When the mixture is chilled, use your icecream maker to churn into icecream. (To use the icecream maker, follow the manufacturer's instructions)


Profiteroles
80g butter
1 cup water
1 cup plain flour
4 eggs

Preheat oven to 225oC. Line baking tray with baking paper.

Melt butter with water on medium high heat in a saucepan, stirring continuously.

Next, add flour to the butter mixture mixing continuously with a wooden spoon. Reduce heat to medium and when the mixture forms a ball and comes away from the side of the pot, remove from heat.

Transfer the dough to an electric mixer and beat once or twice on high to release some of the heat. Next beat in eggs one at a time until the dough is smooth and shiny.

Pipe or spoon dollops approx 2-3 cm in diameter 5 cm apart and bake for 20 mins. Reduce heat to 180oC and further bake for 30-40 mins until the profiteroles are brown and hollow when tapped. (If you are making larger profiteroles then you might need to lengthen the baking time accordingly).


To Assemble

Let profiteroles cool, then cut in half with a sharp knife.

Melt the chcocolate (again I used a microwave, but use a bain marie if you don't know your microwave well), set aside.

Spoon a scoop (or 2) of icecream into one half of the profiterole then top with the other half. Drizzle melted chocolate over the top and serve with fresh blueberries.

Bon Appétit ♥


August 2, 2010

Minty Royals

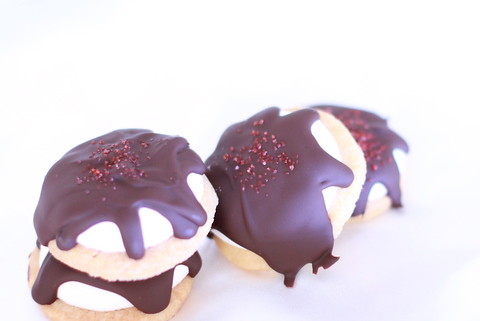
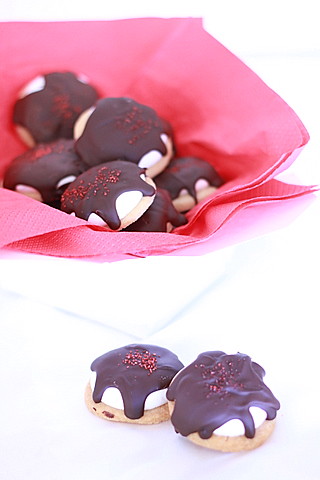
Have any of you guys ever tried Royals from Arnotts? A biscuit base topped with fluffy marshmallow & covered in chocolate... well you should coz they're absolutely gorgeous!!

Since I'm always in the mood for a challenge, I decided not only to replicate these little chocolate goodies but I also attempted to make marshmallow for the very first time!! I thought it would be really difficult and didn't really know where to start to be honest but after scrounging around the web a little it was easy enough for me to find a recipe from the Martha Stewart website.

Without further ado, I present you with my rendition of the Royal...


Minty Royals
1 quantity marshmallow
1/3 quantity of the biscuit base
100g Lindt Mint Intense
Coloured sugar (Optional)

Marshmallow
2 1/2 tsp gelatin
1/3 cup cold water (gelatin)
1/4 cup water (syrup)
1 cup sugar

In the bowl of an electric mixer, sprinkle gelatin over the water and let stand until the gelatin softens (should be about 5 mins)

In a small saucepan, combine the other quantity of water with sugar and stir on medium-high heat until all the sugar is dissolved. Stop stirring once the sugar is dissolved (otherwise it'll crystallize into a sugary mass instead of being a nice thick syrup). Brush the sides of the pan down with cold water to dissolve any sugar crystals which might have splattered up onto the sides. Boil the sugar until it reaches the soft ball stage (115oC). Remove syrup from heat.

Pour the syrup into the gelatin and hand whisk to dissolve the gelatin into the syrup.

Next, beat the mixture using the whisk attachment until soft peaks form (should look like meringue).

Use immediately by either pouring into a greased tray or transfer into a piping bag fitted with a nozzle (nozzle size depends on how big you want your marshmallows!)

Biscuit Base
2 cups all-purpose flour
1/2 teaspoon baking powder
1/2 teaspoon salt
3/4 cup unsalted butter, softened
1 cup sugar
1 large egg
1/2 teaspoon vanilla

Sift the flour, baking powder & salt into a bowl.

Beat the butter and sugar until light and fluffy, then beat in the egg and vanilla.

Add the dry ingredients to the butter mixture and mix until just combined. Lay out a sheet of plastic wrap and place the dough into the centre. Shape dough into a log and wrap with the plastic.

Chill in the fridge until dough is nice and firm (about 4 hours) or you can cheat like me and put it in the freezer for about 30 mins. (The dough can be made in advance and left in the freezer for 3-4 weeks. For convenience, divide the dough into smaller portions and wrap individually before freezing. To use, remove plastic wrap and place in microwave for about 10-20 sec to defrost. NB do not over microwave or it'll become too soft to roll.)

Once chilled, roll out as much of the dough as you need between 2 sheets of baking paper and cut into any which shape or size you want.

Bake at 180oC for about 10-15 mins until golden brown.


To Assemble

Allow the freshly baked biscuit bases to cool on a cooling rack, then pipe enough marshmallow to cover the rounded discs. Let the marshmallows set, about 30 mins (they will still be quite sticky when touched but pulls back when stretched).

Melt the chocolate (I usually do this in the microwave using a DRY ceramic bowl for 10-20 sec at a time ...or you could be more professional and use a bain marie)

Next place another tray underneath the cooling rack lined with baking paper (this will catch the chocolate that dribbles off the cookies)

Cover the marshmallow cookies with the chocolate and sprinkle with sugar (if using). Let the chocolate set.

Bon Appétit! ♥


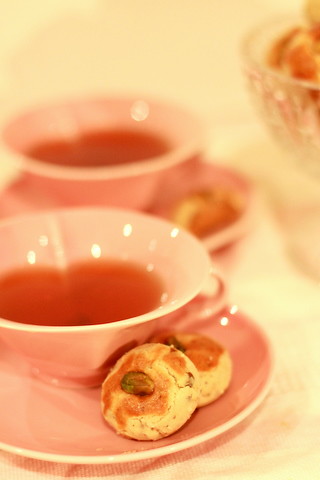
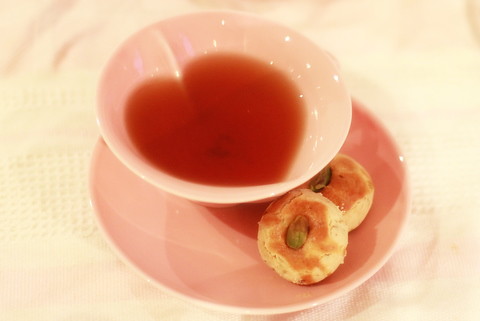
Almond & Pistachio Schookies

A few years back I made a massive batch of these as one of the dowry gifts given to the 'male' family as part of my Aunts wedding. There must have been at least a hundred of these, all piled up high to form a pyramid. It was awesome fun and so yummy, been a while since I've made them so I decided to revisit and give it a twist by chucking some pistachios into the picture.


What is a 'schookie' you might ask? Well, its sort of a cross between shortbread & a cookie hence the name 'schookie'! These little babies are based on the little cookies that you get along with your sweet bean 'soups' at the end of dinner in a Chinese restaurant, traditionally, they're usually just almond flavoured.

These schookies look like dense little cookies but actually, they melt into the mouth with every bite. They're so easy and quick to make, ideal for baking in advance. Just store in an air tight container and serve with tea or coffee to impress friends and family when they come around to visit. Also, the schookies are not very sweet either which is perfect for those fussy older Asian women (like my mum) who complain about sweets being too sweet.


Almond & Pistachio Schookies

Makes 45 small schookies

100 g Almond Meal
100g roasted & chopped Pistachios
1 cup icing sugar
3 cups Plain Flour
1 cup Vegetable oil
1 egg
45 whole unsalted pistachios (optional)

Preheat oven at 150oC & line baking tray with baking paper.

Sift the almond meal, flour & icing sugar into a bowl. Mix in the pistachios. (NB: I couldn't find ready chopped & roasted pistachios at my local Woolies, so what I did was dry roasted whole unsalted pistachios either in the oven or over a medium heat skillet and chopped them up myself.)

Gradually mix in the oil. The mixture should look quite dry and have a breadcrumby kind of texture.

Next, spoon about half a tablespoon (you can make them as large or small as you want so just use this as a guideline) of the mixture into your palm and roll into a ball & place onto the baking tray. Gently push down to flatten the base of the ball so it doesn't roll around. Repeat with the remaining.

Whisk egg lightly and brush over the tops of the balls. Optional: Push the whole pistachios into the middle of each ball.


Bake for 20-30 mins or until golden brown all over. Store in an airtight container, lasts for about 2-3 weeks.

Bon Appétit ♥


LinkWithin

Related Posts Plugin for WordPress, Blogger...