July 24, 2011

Royal Icing, Fondant & Gum Paste

The second half of wedding cake class we learnt to work with royal icing, fondant and gumpaste.

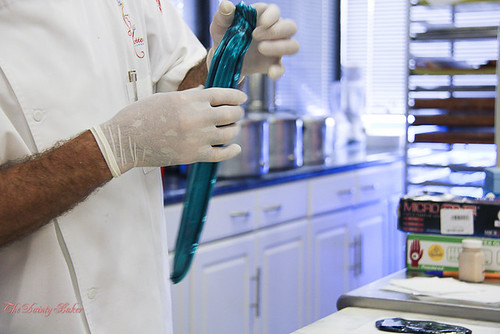
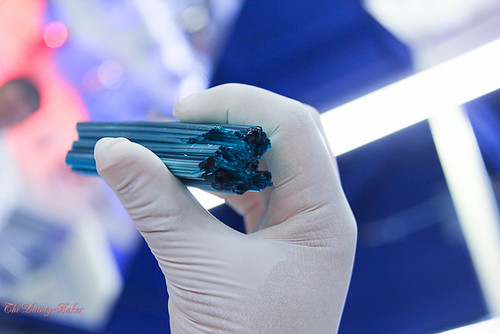
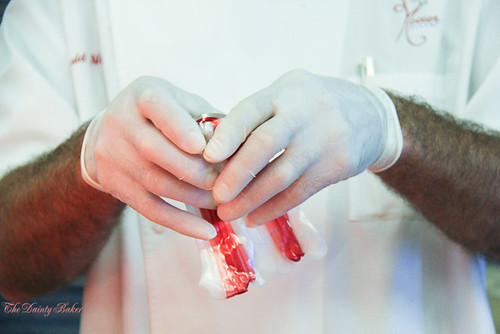
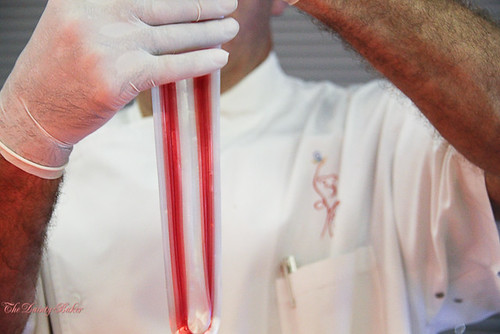
Royal Icing - made from egg whites and powdered sugar. It dries hard and is usually used to pipe flowers, stringwork, flooding and as glue to stick things onto the cake. The recipe that we used in class was very similar, if not the same as the one that I've always used, however, one major difference is the way that it is made.... Usually I would make it just like I am making meringue except there is just a boat load more powdered sugar in the recipe, right? WRONG! To make royal icing you shouldnt beat it too hard/fast. By doing this you are incorporating too much air and it becomes unstable. This is especially important for stringwork, the tiny airpockets will make the icing inconsistent, therefore becoming more fragile and simply put a b*tch to pipe. So when making meringue be sure to whisk the egg whites on a slow to moderate speed. It may seem like its not getting anywhere but the whites with the sugar should be whipped for at least 30 mins so be PATIENT it'll get there.. eventually. Also for added stablity and flexiblity in your royal icing you can add a small amount of gum arabic.

Wedding Cakes-87
Piped royal icing flowers - There are templates that you can find online (mainly from Wilton). We made daisies, pansies, daffodils, apple blossoms and primroses.

Wedding Cakes-86
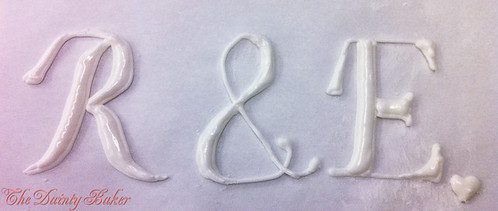
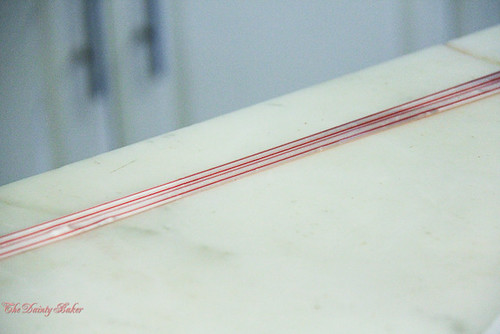
Monograms (I kept calling these mammograms! hahaha) - These are usually letters that are piped before hand and left to dry before transferring onto a cake. To make these you need to pipe the outline of the letters. Let that dry over 24 hours, then thin down the royal icing so that it no longer stands at peaks and pipe inside the lines to 'flood' it. Let this also dry overnight. When peeling off the parchment be very gentle and use a spatula to help you. Needless to say, make sure you make plenty of extras as they are very fragile.

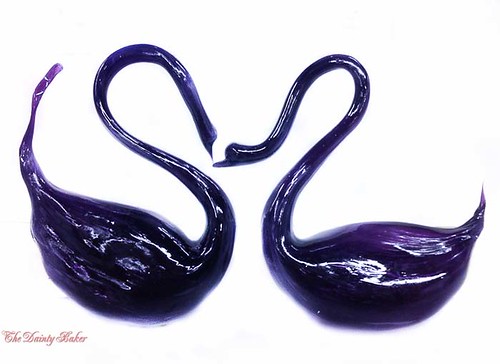
Fondant - this is a sugar based dough that is usually used to enrobe modern cakes and is used to make many cake decorations. It dries out when left exposed so remember to always keep your fondant well wrapped and preferably with a bit of crisco (shortening aka FATTTT) rubbed on it.

Wedding Cakes-90
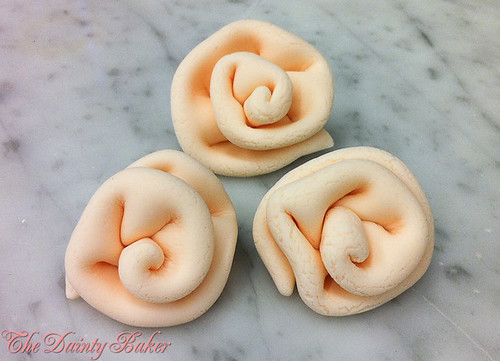
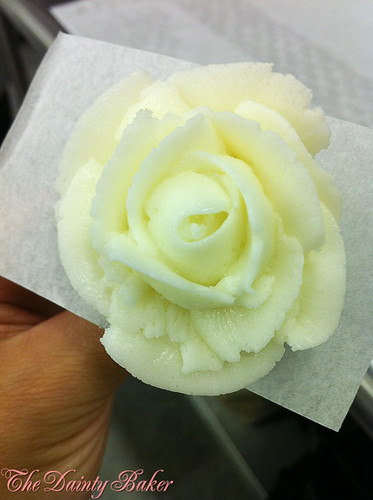
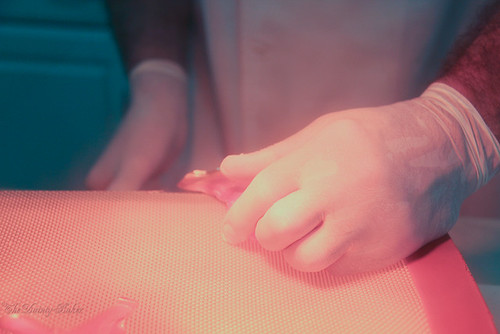
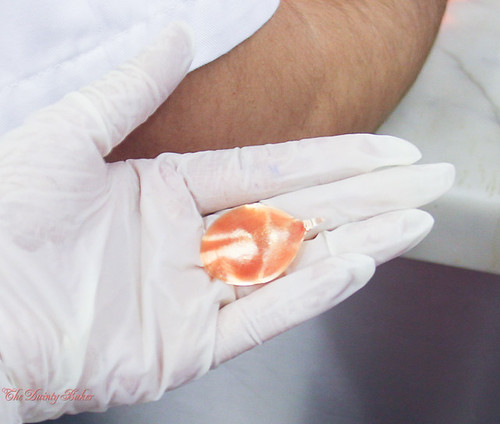
These were little ribbon roses we made from fondant. As you can see it starts to dry up which gives it the crackly look also known as 'elephant skin' so you need to either work faster or keep it well covered if you are not using it.

Wedding Cakes-91
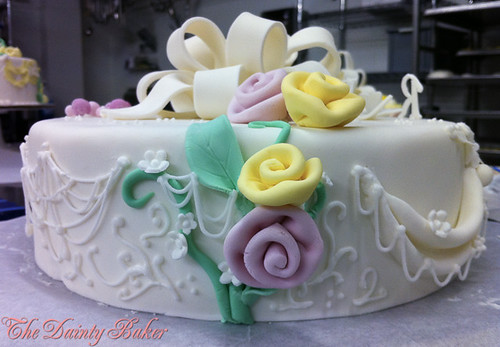
Using fondant is kind of like playing with play doh you just work with it and move it around how you want, to create all sorts of cool stuff on your cake. This was our practice dummy cake, we were practicing different techniques on it and as you can see, I've created a rose bush type thing out of fondant with a fondant bow on top. On the sides you can see stringwork and piping with royal icing.

Wedding Cakes-92
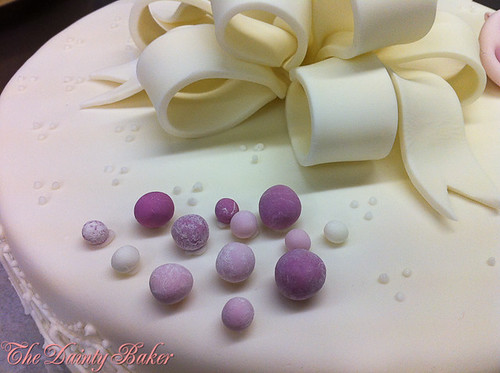
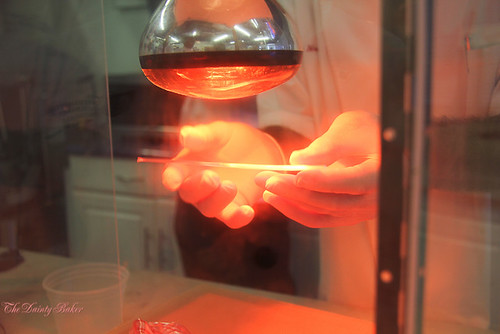
You can also make you own pearls out of fondant. Just roll out a sausage using the fondant then using a ruler measure and cut the pieces the same size. This will ensure that when you roll the fondant, they will come out the same sized pearls. Drop these pearls into a bed of cornstarch so that the bottoms wont flatten and let them dry. When they're dry, rub off the cornstarch and stick onto cake. The ones shown aren't finished yet because usually you would dust them with some pearl dust or shimmer dust.

Wedding Cakes-93
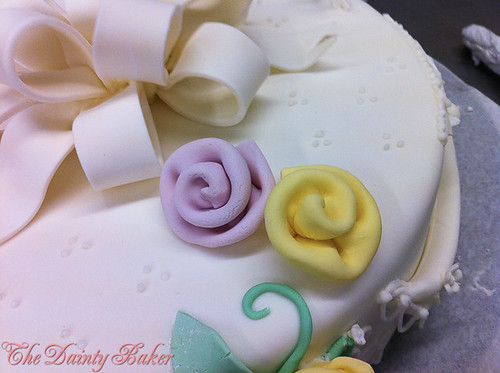
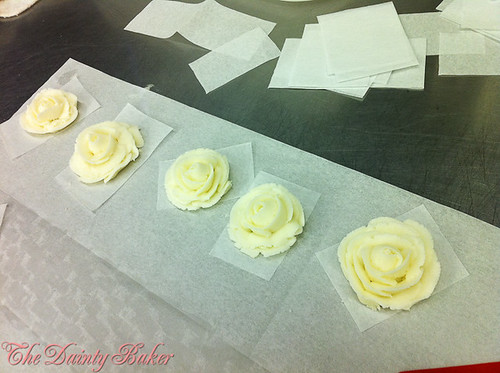
More pretty roses! :) Tip - if you need your fondant to dry quickly, make sure to add a bit of gum tracaganth to it when making it from scratch or just knead a tiny bit into it when working with it.

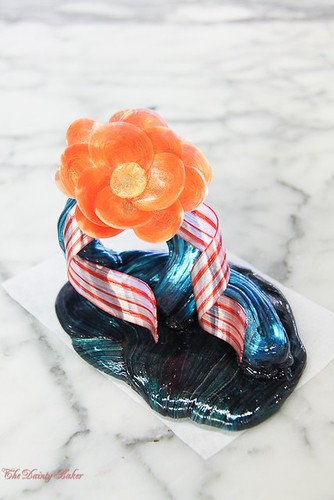
Gum paste - this is very similar to fondant except because it doesn't dry out as quick, it gives it more open time to work with. The inclusion of gum tracaganth in gum paste gives it more flexibility to be rolled out thinner therefore creating more realistic flowers.

Wedding Cakes-95
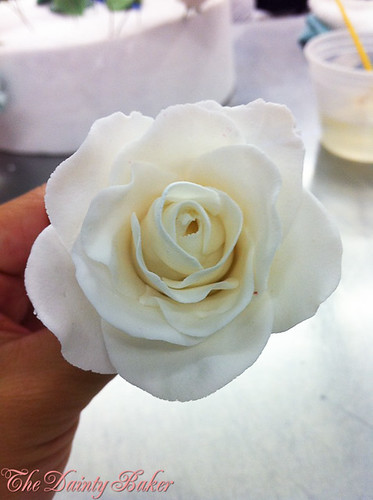
This is a rose made out of gum paste before petal dust is added. You need to paint the flowers with petal dust to give it dimension and a more realistic look otherwise it will look too flat and too uniform.

Wedding Cakes-94
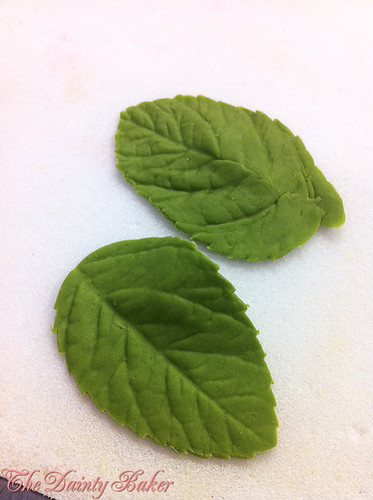
Leaves - These are just cut with leaf cutters then pressed into a veiner to create the texture on the leaves.

Wedding Cakes-79
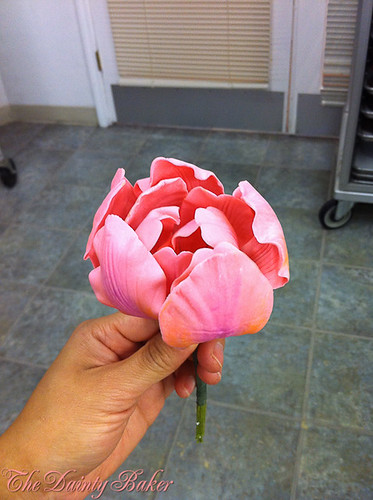
This was my very much failed attempt at making a tulip! lol I let the petals dry, curved too much. Usually you just need a slight curve and only 6 are used to make a tulip but because mine were almost bent 180 I decided to put all the petals I made together to form one mother load flower which funnily enough looks like a peony! WIN!! :)

Wedding Cakes-78
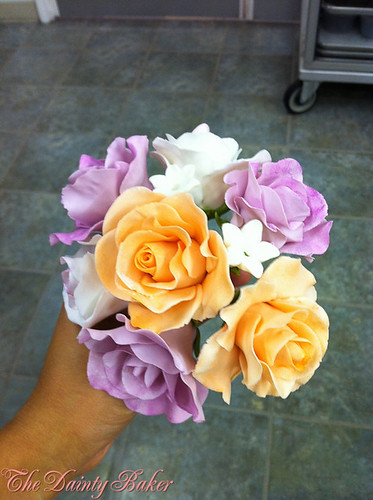
My lovely bouquet of roses with little white blossoms in between. It was so difficult to tie them together! You need to do it one at a time, binding them together at the stem using flower tape.

Wedding Cakes-76
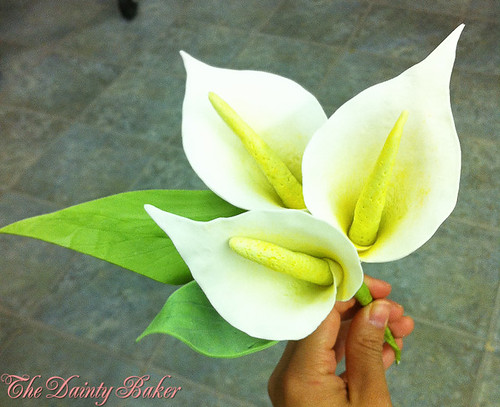
These probably were my best work in terms of flowers, they were really easy to make too. Just cut out the one petal, thin out the edges using a baller and wrap around the already made stamen. Finish with petal dust and leaves.

I loved making flowers, its time consuming but it was quite therapeutic. When I have time I will post up step by steps of how to make each of these flowers :)

Peace! x

Buttercream Wedding Cakes

Love weddings! Such a joyous and happy occasion! I remember the first time I made a wedding cake... it was quite a feat. The reception was for 300 ppl so it had to be a pretty big cake, it was my cousins wedding so I decided to give it a shot as their wedding gift. Now that was a solid 5 tier mamma made out of chocolate mud and buttercream.

5 Tier Wedding Cake

The topper was from the florist... which I thought was going to be a simple rose bouquet but you work with what you get, so it was a little more old fashioned than I had hoped for. Now, I baked and decorated it in time for the wedding... phew, it delivered in one piece... phew phewwww... but when I came to stacking it... the dowels were cut with a stupid garden clipper thing, where you had to have Arnie sized guns to operate... so they werent all uniform... leading to the problem of the night. The cake started to tilt and sink toward the back. In a panic attack I ordered them to cut the cake immediately, thereby avoiding disaster! :) ...but I've since been dubbed... the 'leaning tower of pisa cake maker!' :S lol

So when we had the wedding cake class I was very excited because I love wedding cakes and I wanted to learn to do it properly! Here begins my series of things that I've learnt in the wedding cake classes, I have to do it in a series of posts coz I think blogger will explode from the amount of pics I want to put up! lol

The first thing we learnt was how to pipe... shells, reverse shells, rosettes etc etc... but we also learnt how to pipe buttercream roses... now these were HARD!

Wedding Cakes-80 Wedding Cakes-81

Mine look more like little cabbages lol... I blame the heat from the ovens, it kept melting my buttercream!! However, after a little airbrushing and some supporting piping around it, it didnt look too bad! lol

Wedding Cakes-82

Personally, I dont really like this type of wedding cake. I think it looks very old fashioned to me. This is typically an American style wedding cake, where the cake itself is covered/finished with buttercream icing and decorations.

A tip for torting (cutting the cake into layers) so you get even layers is, 1. Use a SHARP knife. 2. Use the part of the knife closest to the handle. That way you are controlling where you are cutting as you twist the turn table to move the cake around.

Wedding Cakes-85

Also when filling the layers with icing you can also create a "dam" by piping a tube of buttercream icing along the circumference of the cake before filling the middle, so that it doesnt run out the sides.

Wedding Cakes-97

Most of the wedding cakes that you see made out of buttercream icing have completely smooth sides... now the trick to getting the buttercream icing perfectly smooth around the cake is to use a bit of hot water. As with most cakes you will need to do a crumb coat, let that chill, then after add another coat of buttercream icing over the top of this chilled crumb coat. You can go an additional layer but it isnt really necessary if you do the crumb coat properly. When the cake is cooled with the crumb coat, as soon as you put the next layer on the buttercream should set pretty quickly. So by dipping your offset spatula into the hot water whilst icing, it'll result in a smooth final layer of icing. Hope this helps!

Wedding Cakes-84
The rest of the class' buttercream cakes :)

Wedding Cakes-83
Keep tuned!

July 17, 2011

Chef Notter Professional Sugar Class

After my epiphany and realising what a bad little blogger I am.. I have finally gotten my act together and sorted out my pics to write this next post.

I've been in the States for about 3 months now. In that time I have seriously never had so much bad luck, emotional break downs but fun and rude awakenings to reality. I was the victim of crime, admitted to hospital, had no identity for about a month, eaten enough bread to last a life time, travelled ALOT and partied like I was 18 again hehehe.

Notter School -1

In this time I also started as a student at the Notter School of Pastry Arts (never noticed it before but if you say the name really fast or in my case with a supposed "Aussie accent", it actually sounds like Not A school of Pastry Arts lol). I did promise to blog about it all but like most things in my life at the moment. I haven't had time or energy to do so... until now.

Chef Notter Sugar Class-94

So without further adieu, I will present you with one of the Professional Classes I took at Notter, taught by the infamous Ewald Notter himself. Sorry I lie, just a bit about Chef Notter first... (just incase you havent heard of him). He is one of the world's leaders in Confectionary Arts and has won many accolades including the honour of "One of the Finest Confectionery Chefs of the World". His forte is Sugar Pulling and Blowing and Chocolate.

Chef Notter Sugar Class-206
This was one of the pieces that Chef Notter did in class, he was able to put this together in a matter of mins it was amazing watching him demo.

The class that I took was called "Sugar Fundamentals and Trends" and.. it was AMAZING!!! I had only started at the school a week before I took this class and I was absolutely blown away. We learnt to make sugar show pieces (obviously not to the magnitude of what the pros out there can do) and how to blow and pull sugar.

The first thing we learnt to make was this small flower piece.

Chef Notter Sugar Class-29

There are several techniques that are used to make this piece.

Firstly, pulling the sugar to incorporate air. Basically it is pulling the sugar and bending it over so that it is side by side. Then you wrap it around to form a tube and repeat the process. Eventually you will end up with a tube with air inside like shown in the picture on the right.

Chef Notter Sugar Class-14 Chef Notter Sugar Class-17

Secondly, the ribbon. Similar to the branch (above) you place the coloured sugar side by side with the white then you pull, bend it over side by side and pull again until you get the pattern you want. Once you get the pattern you rub the sugar whilst pulling so that it becomes really thin. Use a heated spatula or knife to cut into the ribbon size you want. To shape the ribbon, place it under the heat lamp so that it softens. You can curve it or manoeuvre it any way you want this way.

Chef Notter Sugar Class-27 Chef Notter Sugar Class-28
Chef Notter Sugar Class-24 Chef Notter Sugar Class-25

Finally, the petals. To make these you need to pull it from the main sugar mass with your thumb then shape it in your palm to get the petal shape. These were a pain in the butt! The heat lamp was really hot and the sugar itself was even HOTTER. I managed to get blisters on my thumbs by the end of class :S

Chef Notter Sugar Class-22 Chef Notter Sugar Class-21

Since everything is made out of sugar, to assemble you just need to heat the sugar so that it melts and then glue the pieces you want together. Sounds simple but when its 100 deg plus, the shape isn't staying because the sugar is still soft, then as the sugar cools and becomes delicate and brittle and breaks with too much pressure..... it gets pretty frustrating.

These are some of the other pieces we learnt to make.

Onion Man - others made a snow man or a clown ... i decided to be creative and make a cross between an onion and snowman lol. We made this by blowing sugar, which is pretty hard especially getting it perfectly spherical... really need a midas touch for it.

Chef Notter Sugar Class-46

This is my favourite piece. It's so elegant! I love the rose and the swans! ... although the making the rose was the death of me. I was ready to smash the damn thing! lol

Chef Notter Sugar Class-128

This was the last piece we made, it was such a fun piece. Oh and I got to finally use an airbrush machine :) I painted the fish using the airbrush machine which was very cool. Can you tell that my fishy is a girly one... like? :)

Chef Notter Sugar Class-207

Aww these were the others in the class ♥

Chef Notter Sugar Class-210

Overall, an immense 3 days of fun fun and hotter than hot!! But totally worth it :D Here are some of the other mind blowing show pieces that Chef Notter has made.

Chef Notter Sugar Pieces-3

Chef Notter Sugar Pieces-2

Chef Notter Sugar Pieces-1

ps. If your interested in seeing the step by step pics of how to make each of those sugar pieces please visit The Dainty Baker Facebook Page ... and dont forget to LIKE it :)

July 14, 2011

Where has the time gone?

Ok so I was checking out Cook Republic's Blog, her post was about her blog turning 1. This made me think "hmm I wonder how long I've been blogging" ... and alas the 13th of July a year from today was the day that my dainty little blog was founded :O

I know, I feel like a terrible parent who's forgotten their kid's birthday :(

So readers (if I have any left) I have no fancy post to celebrate my humble little blog's 1 year bloggiversary but I do have some pics of what I have been up to ...

Hope you enjoy them as much as I did taking them.

Much love xx

Rhonda ♥

LinkWithin

Related Posts Plugin for WordPress, Blogger...