November 24, 2010

Technical Difficulties - Pavlova Alert

Error: The Dainty Baker's desktop has blown up... please replace relevant parts to get system up and running again.

Yes, my computer is f*cked (to put it politely). It just wont turn on.

So.. this means no proper blogging until I figure out what is wrong with it and how to fix it :( ... Exactly what I need before the festive season, isn't it?!

Anyways bear with me... I'll be posting piecemeal (not that I don't do that already) and the photos might be a little raw (because I CANT EDIT!) lol

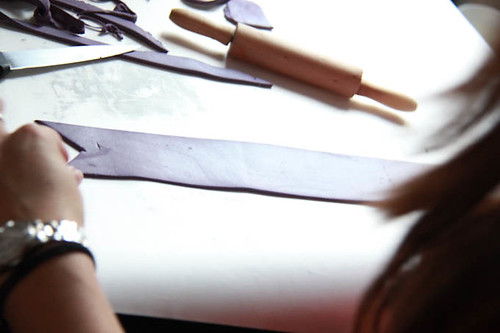
I will however, leave you with a simple yet lovable classic, took the pictures with my iPhone (bless thee)!
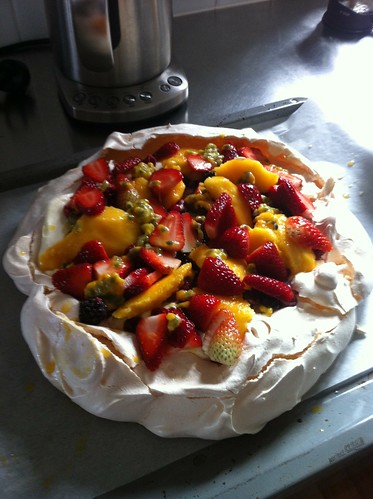
Pavlova 1

Pavlova

3 egg whites
175g caster sugar
1 tsp cornflour
white wine vinegar
1 tsp vanilla essence

300 ml Double cream - whipped
1/4 cup sugar
1 teaspoon vanilla essence

To decorate:
Any fresh fruit of your choosing - I usually use raspberries (you can use defrosted ones), blueberries, passionfruit, strawberries & even mango for a summer twist!

Preheat oven to 150oC. Line a tray with baking paper. You can choose to draw a circle on the underside of the baking paper if you wish, to guide where the meringue should sit but I usually just do it free hand (i.e. pour the meringue on and shape it however I like :P)

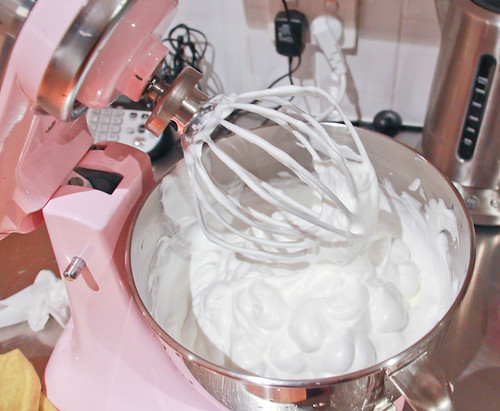
Whip egg whites until foamy (bubble bath like). Then add in half the sugar and whip until at soft peak stage (shaving cream like).

Gradually add in the rest of the sugar, corn flour, vinegar and essence and beat until mixture stands at stiff peaks.

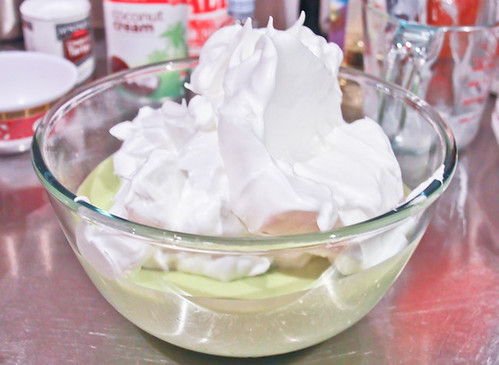
Pour onto the baking paper and shape into a nest, bake for 1 hr and then let cool in the oven.

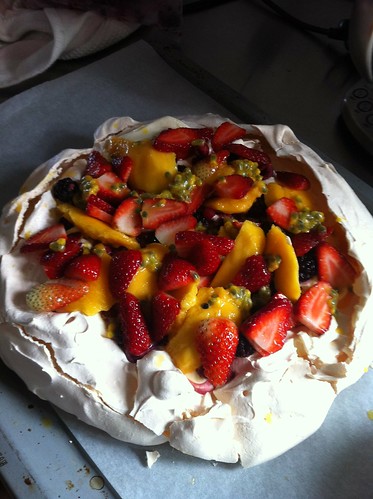
Whip cream together with the essence and sugar, then spread on top of the cooled meringue nest. Finish with toppings of your choice.

Pavlova 4

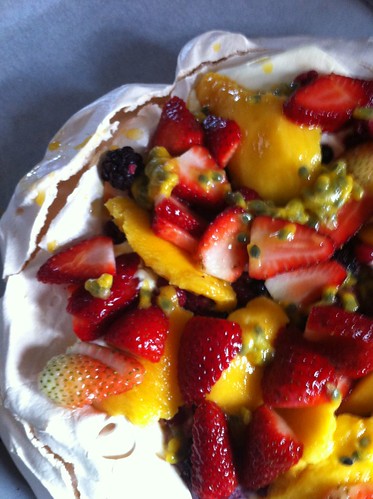
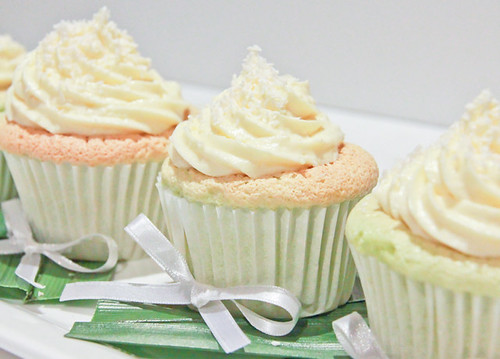
I love pavlova, its so easy and quick to prepare. The crunch of the outside balances beautifully with the fluffy inside and the fruit takes away the sugary guilt of the meringue ;)

IMG_0322[1]

Pavlova 2

Hope you guys are having a better week than me.

x

p.s. any IT tech heads out there who are willing to gimme a hand.. and maybe even do some charity work hehehe feel free to email me :D

November 12, 2010

Potato & Crab Korokke

I've been having what I call, TWS - Traveller's Withdrawal Symptoms. I miss the anticipation and hype of getting to the airport, walking through the brightly lit duty free stores, getting on a plane (and trying to watch every fricken new movie they have to offer), then finally arriving with a buzzing excitement, in a completely new country, where I just want to immerse myself in the people, culture and atmosphere. Every bone in my body aches for it, oh how I love to travel!!

Potato & Crab Croquette-6

So, in the midst of my TWS, I decided to replicate a dear favourite.... Korokke (Japanese version of croquettes)!!! The story behind these deep fried golden nuggets of yumminess started last year... I went to visit my gf who was studying in Osaka at the time. I spent a good 3 weeks in Japan and I got so hooked on these little babies! I had to have my fix nearly everyday!! It was great because you could just walk to the nearest Japanese convenient store (which are WAYYY cooler than the convenient stores we have here I must admit) and pick some up, along with all the cool Glico snacks and drinks!!

Potato & Crab Croquette-2
I had to share with you all my knife skills.....was thoroughly impressed and surprised with myself hehehe

Potato & Crab Croquette-3
Coated potato ovals

Potato & Crab Croquette-4
Freshly fried Potato & Crab Korokke

Potato & Crab Croquette-5
Oishii!!

Potato & Crab Korokke
Adapted from About.com - makes about 30 x 8 cm long oval korokkes

12 medium potatoes
2 x 170 g can crab meat
1 small carrot, finely diced
1/2 onion, finely chopped
1/2 x 125g can of whole corn kernels
salt & pepper to season
vegetable oil for frying
4 eggs - lightly whisked
flour and panko (breadcrumbs) for coating

Peel and cut potatoes into medium chunks. Boil potatoes until soften. Drain and mash potatoes while they are hot.

Add onions, carrot, corn & crab meat to the mash and mix well. Season with salt & pepper.

Scoop a heaped tablespoon of the potato mixture into the palm of your hand and shape into a flat oval shape similar to hashbrowns. Repeat with remaining potato mixture until they are all shaped.

To coat with crumbs:
Pat the shaped potato with flour, then dip into egg then coat with panko.
Tip: To make this process easier and mess free, line up the flour, eggs and panko (in that order) in separate bowls and have a tray ready at the end of this line to put the korokke on.

Once all the potato ovals have been coated, refrigerate over night or place into the freezer until firm. This makes handling easier as they won't fall to bits when you try to pick them up.

Heat the oil in a large wok. The oil is hot enough when you put a little bit of the panko in and it starts to bubble. Once the oil reaches this stage slowly slide in the korokke one by one, don't overcrowd the wok (depending on the size of your wok, you can fry 3-4 at the same time). Don't fiddle too much with the korokke but turn them over once in a while to get an even goldenness. They will be ready when golden all over.

Remove the korokke from the wok and place onto an absorbent paper towel.

Serve with Takoyaki sauce (sort of like a bbq sauce), you can get this from Asian grocery stores or from Tokyo Mart in Northbridge Plaza.

Potato & Crab Croquette-7

Enjoy!! ♥

November 8, 2010

Homemade Soybean Milk

I love soybean milk!! Not the kind that you buy from Woolworths or Coles... i.e. not the Western ones but the Asian soybean milk that you can only get from Asian grocery stores. It's a lot thinner and more like a soybean flavoured drink than milk really. I love it so much I buy it by the litre bottle, stick a straw in it and drink it straight out! Until I read about it on Scandi Foodie, I never really thought to make my own, just like normal milk... it was always just there... but boy oh boy! You can!! *Squeal*

Soybean Milk-1

The wonders of nature and cooking also really surprised me, see the picture above... what do you think they are?... Well, they're both uncooked soybeans!! Except the ones on the left are dry and the ones on the right have been soaked overnight in water. Don't they look completely different? I was like say what??? Who swapped my beans? hehehe yes, yes I am easily amused :)

Homemade Soybean Milk
Adapted from Scandi Foodie

125 g soy beans (will make litre of milk)
1 litre water
1/2 cup sugar (optional)

Wash then soak the beans overnight in plenty of fresh water.

The following day, drain the beans, transfer to a bowl and microwave for 2 minutes on high.

Transfer beans to a food processor then add water and pulse until smooth.

Pour the mixture into a large pot and boil for 10-20 mins on high. Note: This milk will froth and bubble like normal milk so watch the heat and adjust so it doesn't bubble over.

Soybean Milk-2

Sieve the mixture through a fine sieve or through a cheese cloth and recover the soy milk. Add sugar and dissolve (if using). You can adjust the amount of sugar added to control the sweetness of the milk.

Serve hot or cold (I prefer cold) ♥

Tip: The milk can keep, refrigerated for 2-3 days.

Soybean Milk-3

November 4, 2010

Pandan Chiffon Cupcakes with Coconut Creamcheese frosting

I've had a very strong craving for anything 'pandan' flavoured lately... might be because I've had House's BTS dessert on my mind (for those who don't know, besides it being AMAZING... its pandan icecream on a fluffy warm toasted brioche drizzled with caramel sauce.. O.M.G)

I wanted to make pandan icecream but with the temperamental weather I opted for something else... Pandan Chiffon... CUPCAKES!

Pandan Chiffon Cupcakes-5

Pandan Chiffon Cupcakes
Adapted from The Malaysian Cuisine - makes one 25 cm chiffon cake or 30 cupcakes

6 Large Eggs, separated
1 Additional Egg White
2 1/4 cups Plain flour
1 1/4 cups White Sugar
1 Tbsp Baking Powder
1/2 tsp Sea Salt
1/2 cup Pandan Juice (Blend 5 Pandan Leaves with 2/3 cup Water or use Pandan Essence)
3/4 cup Coconut Milk
2 Tbsp Vegetable Oil
3/4 tsp Cream of Tartar
1 tsp Pure Pandan Extract (Optional)
15-20 drops of green food colouring (Optional)

Pandan Chiffon Cupcakes-6

Separate the eggs and place the whites in one bowl and the yolks in another. Cover with plastic wrap and bring them to room temperature.

Preheat the oven to 170˚C and line 3 x 12 cupcake tins with cupcake liners.

Sift together the flour, sugar (minus 3Tbsp), baking powder & salt. Make a well in the center of the flour mixture and add the egg yolks, oil, Pandan juice, coconut milk , and pandan extract, if using. Beat about one minute or until smooth.

In a separate bowl, with the whisk attachment, beat the egg whites until foamy. Add the cream of tartar and continue to beat until soft peaks form. Gradually beat in the remaining 3Tbsp of sugar and until stiff peaks form. With a large rubber spatula or wire whisk, gently fold the egg whites into the batter just until blended (being careful not to deflate the batter).


Spoon 1/2 cup of batter into each cupcake hole. Bake for 20-30 mins until golden brown and springy to the touch. Remove from oven and let cool over a wire rack.

Pandan Chiffon Cupcakes-4

Coconut Cream Cheese frosting
Adapted from Simply Recipes - covers about 12-15 cupcakes depending on how generous you want to be with the frosting. This frosting is amazing!! Sweet with a slight saltiness laced with coconut bits mMmm..

1/2 cup of butter, room temperature
250g Philly cream cheese, room temperature
1/2-1 cup of powdered sugar
1/4 cup of sweetened desiccated coconut

Cream the butter and cream cheese together, about 3 minutes. Scraped down the sides and bottom.
Slowly add the powdered sugar, taste as you go adding more sugar until you have reached the desired sweetness.
Fold in the coconut. Pipe onto cooled cupcakes.
Sprinkle on a bit of extra shredded coconut on top and serve.

Pandan Chiffon Cupcakes-8

These cupcakes are the fluffiest!! (It's soooo fluffy I'm gonna DIEE!!!) The coconut milk helps to keep the cupcakes moist and it works so damn well with the subtle pandan flavour. For a truer pandan flavour I would suggest to go with actually making your own pandan juice. I used store bought pandan essence and found that it was quite artificial tasting, so next time I will definately use a combination of real pandan juice with a Tbsp of the essence to enhance the flavour. Also with the green food colouring... you can add as much or as little as you like... just depends how nuclear looking you want your cupcakes to look, I used about 15 small drops and the colour turned out just a slight pastel green.

Pandan Chiffon Cupcakes-7

Can you see the inside fluffiness!!?! *points downwards*
Pandan Cupcake
Bon Appétit ♥

November 1, 2010

LA Lakers Kobe Bryant Cake

LA Lakers Cake-3

The story behind this cake goes something like this...

Wednesday Morning @ Work
G: "Darl I know this is late notice but could you PLEASE PLEASE PLEASE make a Lakers cake for A's birthday?" (G is my bestie & A's awesome gf)
R: "Sure when do you need it by?"
G: "This weekend"
R: O.o "But I'm going away for the weekend.. leaving Friday and I'm taking the kids for a movie on Thursday..."
G: "PLEASE PLEASE PLEASE!"


Wednesday late evening
R: "YOU TOTALLY OWE ME! .. buggered as .. come pick it up tomorrow x"
G: "You're the best!"

Thursday afternoon after work

LA Lakers Cake-9
R: :)
G: :D
A: :D

Crazy huh? But boy, I felt on top of the world being able to pull it off and it was worth all the effort once I saw their faces and reactions at the sight of that cake. I think that is exactly the moment I savour most as a baker (next to when the first bite is eaten, of course!), the moment where their eyes light up & pure bliss hits their faces when they see the edible creation infront of them, you can almost see them jumping around inside like a little kid again... such joy! :) That's why I love baking so much, it enables me to bring so much love and happiness to those around me by allowing me to share these special moments & memories with them through my food and cakes.

LA Lakers Cake-2
To make this cake, I used 2 x the recipe here, baked in 2 rectangular pans. To shape the cake, I cut out sleeves for "arms" in the top 2 corners of each rectangular slab cake.

The frosting was one that I had previously made here, the only difference is I added some Frangelico to the frosting too... similarly, before I sandwiched the two rectanglar slabs together with frosting, I brushed/soaked them with more Frangelico. Besides the booze factor, it also helped to keep the cake moist :)

LA Lakers Cake-1

The cake was covered with Orchard's White Icing (a premade fondant you can get from Woolworths or Coles) and I also used Wilton's coloured pastes to colour the fondant.

Tip - instead of using icing sugar, use cornflour whilst rolling out the fondant so it doesn't stick to the surface or your hands.

Happy 24th Birthday A, hope you had a great one! x

LA Lakers Cake-4

LinkWithin

Related Posts Plugin for WordPress, Blogger...