October 27, 2010

Pear & Raspberry Bread

Pear and Raspberry Bread-2

Anybody who knows Miss Rhonda, knows that I do NOT like bananas .. infact I detest them with a passion and feel nauseated at the thought of them. I don't know how this innocent grudge started but to put things into perspective I don't remember the last time I went anywhere near anything to do with bananas... banana smoothie .. nope, pancakes & bananas .. nope, banana bread.. nope!

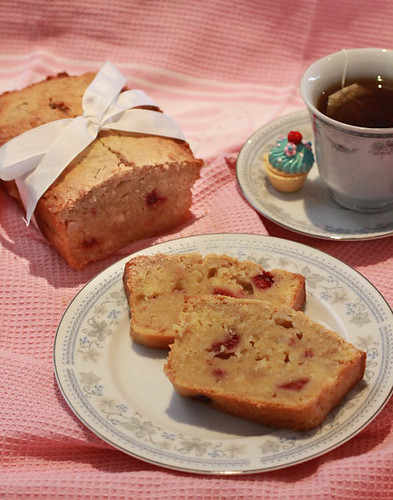
Yet, everytime we go to a café I always see people ordering banana bread... and if I have to be honest with you.. it does look really comforting and I just want to take a bite but I cant bring myself to do it because it contains banana. So instead I have found myself what I believe would be the closest substitute, Pear & Raspberry bread :)

Pear and Raspberry Bread-3

Pear & Raspberry Bread

Adapted from Wabi Wabi

3 pears, grated (for 2 cups pear pulp - I used Bosc pears)
1 Tbsp lemon juice
3 cups plain flour
1 cup castor or raw sugar
1 tsp baking soda
1/2 tsp baking powder (I forgot to add this for some reason, but it still turned out ok so meh)
3/4 cup melted butter
3 eggs
2 Tbsp milk
2 tsp vanilla extract
1/2 cup frozen raspberries

Preheat the oven to 180° C and line a large loaf pan with baking paper.

Peel the pears and grate over a medium bowl, collecting all the juice and pulp you can. Douse the pear mush with lemon juice and set aside.

In a large bowl, sift the flour, baking powder, and baking soda together. Stir in the sugar.

Whisk together the butter, eggs, milk, and vanilla in a glass jug. Pour into the dry ingredients.

Tip in the grated pears and stir together until just evenly combined (It was a little hard to stir so I just got my fingers into the batter and mushed it all around until it was mixed evenly). Stir through the raspberries.

Spoon the batter into the prepared pan. Smooth over the top but don’t be too fussy. Place in the oven and bake for approximately 1 hour and 20 minutes, or until the surface of the loaf is golden and the centre firm to the touch.

Allow to cool for 10 minutes before removing from the pan. (This is important - don't be impatient like me otherwise not only will you burn yourself, when you cut into it, it will be soft and you won't get nice perfect slices).

Bon Appétit ♥

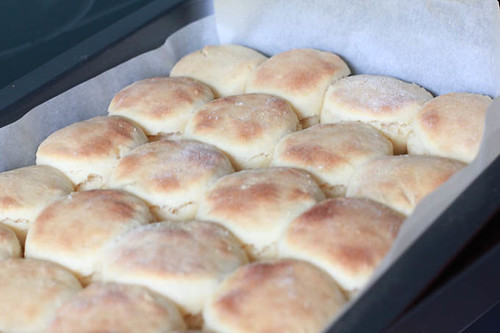
Tip: If there is left over batter because your bread tin is too small, then pour into individual muffin tins - I actually prefer it this way because that way you don't even need to bother to slice it up and its easier to take to work for morning tea the next day! ;)

Pear and Raspberry Bread-4

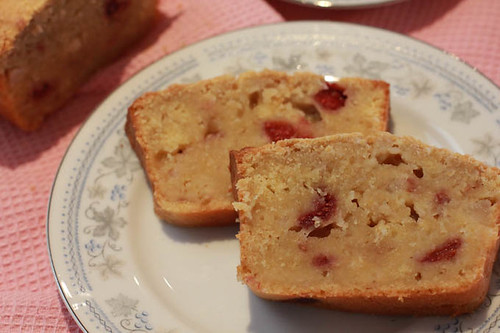
This is a great recipe, its not too sweet and every now and again you get bursts of raspberry on a subtle backdrop of pear bread, which is great because I thought the pear would be very overpowering but its not. Also for all those who don't like cooked fruit (which I attribute to the mushy texture it can sometimes have) this will be perfect for you because its not mushy at all and the combo just works so well, as... it IS the bread rather than being bits of mushy pear in bread. Enjoy! xx

Pear and Raspberry Bread-5

October 24, 2010

Buttermilk Scones

When I was young, I went through a phase where all I wanted to eat were scones. I remember I would nag mum to take me to Bakers Delight all the time. I remember one day, I decided to try to make some but it was a total disaster.... the scones were dry and very hard, needless to say it scarred me and I have not attempted to make any since.... until now.

Buttermilk scones-2

These scones are the best thing that has happened to me in a while, they were everything a scone should be, crusty outside, soft insides, delicate yet dense and totally drool worthy! (My brother ate 5 scones in one sitting) The buttermilk gives it a very subtle milky/buttery flavour without being too greasy or over powering. They were just divine straight out of the oven with slashings of strawberry jam and double whipped cream melting into my fingers.. YUM!

Buttermilk scones-1

Buttermilk Scones
Adapted from 'Sweet Old-Fashion Favourites' by Women's Weekly

3 cups self raising flour
1/4 tsp salt
1 tsp icing sugar mixture
60g butter
1 3/4 cups buttermilk

Preheat oven to 230-240oC. Grease a 23 cm square slab cake pan (can also just use any rectangle pan)

Sift dry ingredients into large bowl, rub in butter. Stir enough buttermilk to mix to a soft sticky dough.

Turn dough onto a floured surface, knead until smooth. (Note: don't add too much flour whilst kneading or the scones will be dry - trick is sprinkle flour onto the dough to stop it sticking to the surface. The middle should be still sticky but should hold together.)

Press/roll dough out to 2 cm thickness and cut into 5.5 cm rounds.

Place rounds in the prepared pan; bake for about 15-20 mins until tops are golden brown.

Serve with jam and whipped double cream (or whatever condiments tickle your fancy... nutella perhaps? ;) )

Bon Appétit ♥

Buttermilk scones-3

October 18, 2010

Fudgy Rich Brownies

So I've been a little lazy lately and haven't been posting ... but can anyone blame me? .. The weather has been sooo good lately and I've been engrossed in either attending a Sydney food blogger's picnic, eating the town away with the SIFF festivities going on or horse riding....

But to share a little something special with you all... here is my favourite brownie recipe. It was once given to me by a dear friend - G and I've held it very close to my heart ever since ♥

Fudgy Rich Brownies-1

Fudgy Rich Brownies

1/3 cup butter
1/3 cup cocoa
1 cup sugar
2 eggs
3/4 cup plain flour
Chocolate chips (or chunks of your favourite chocolate - I usually use about 3/4 of a chopped up block of milk Cadbury but feel free to go crazy or less crazy... what ever floats your boat)

Preheat oven to 180oC. Line a square cake tin with baking paper.

Melt butter with cocoa in a medium sized pot over medium heat.

Once butter has melted, remove pot from heat and stir in sugar. Then mix in the eggs. Then flour, mixture should be thick and rich.

Pour mixture into the lined tin and spread so that it is of even thickness. Push your chocolate pieces into the mixture so that it covers the chocolate.

Bake in the oven for 20-30 mins until it is firm to touch. Note: Don't over cook the brownies or you wont get the soft chewy fudgy centre.

Remove from oven let cool slightly and cut into 4 x 4 squares (or what ever shape you want).

Bon Appétit x

Fudgy Rich Brownies-2

I usually make 2 or 3 times the recipe above because everytime these little babies go soo quickly. They're rich but not too sweet and chewy but not gooey... I absolutely love them!! Another great thing about them? It's so quick and easy to whip up and there's minimal washing up to do because its all mixed in one pot! Booya! Win on all fronts! .. Cherish it! x

Fudgy Rich Brownies-4

Another little thing I want to share with you all are the flowers I've received lately, theyre absolutely stunning, don't know what the real name is but I dub them "Avatar Flowers" ♥

Fudgy Rich Brownies-3

Fudgy Rich Brownies-5

October 4, 2010

My Awesome Bolognese

Ok, so I'm not a bragger but this bolognese recipe is seriously the best and my favourite of all time. I love it because its jam packed with flavour and it is sooo versatile! The chilli adds a bit of a kick to it and really lifts the dish from ordinary "Spagh Bol" to a "Blow your Mind" gourmet pasta dish! ... I've kept this as a secret recipe for too long.. it is unfair to be so selfish, so I've decided to share with you all! Afterall, everyone needs a good bolognese recipe in their repertoire, hope this can be yours too! x

Bolognese_1

bolognese_2

Rhonda's Awesome Bolognese

3 Tbsp olive oil + 1 Tbsp extra
2 cloves garlic, chopped
1 small onion, chopped
2 sprigs Thyme - remove leaves off the stem
handful of Basil leaves
handful of Oregano leaves
2 bay leaves
1 can (800g) whole tomatoes
500g pork & veal mince
1/4 cup red wine
2 tsp chilli flakes (optional)
salt & pepper

bolognese_3

Heat oil in a medium pot with onions, garlic and bay leaves until onions turn translucent.

Add the can of tomatoes to the pot and break up the whole tomatoes with the back of a fork, bring to the boil.

Once it has reached boiling point reduce heat, let simmer for about 40 mins - 1 hr until it is reduced. At this point, throw in your herbs, chilli (if using - you can turn the heat up or down to your liking by adding more or less chilli flakes) and wine and simmer for about another 15 mins. Remove bay leaves.

Whilst your sauce is simmering, heat the extra 1 Tbsp oil in a fry pan. Cook the mince until browned all over. Add the sauce to the meat and stir. Season with salt and pepper.

Serving suggestions:
Traditional - Over some pasta with freshly grated parmesan
Funky - as the meat filling for lasagna
Naughty - over some buttered toast after a big night out... best hang over breakfast EVER!

Tips:
* If the sauce gets too acidic, add some sugar to balance out the flavour.
* This sauce tastes better the next day as all the flavours have developed and matured.
* Make a large pot over the weekend and place serving portions into ziplock bags, then place in the freezer for easy hearty microwave meals during the weekdays.

Bon Appétit ♥

bolognese

P.S: Incase you're wondering, that awesome bottle of wine in the picture above is David Hook's Rosé 2010, it is so incredibly light and easy to drink, perfect for the warm weather coming up! xx

LinkWithin

Related Posts Plugin for WordPress, Blogger...