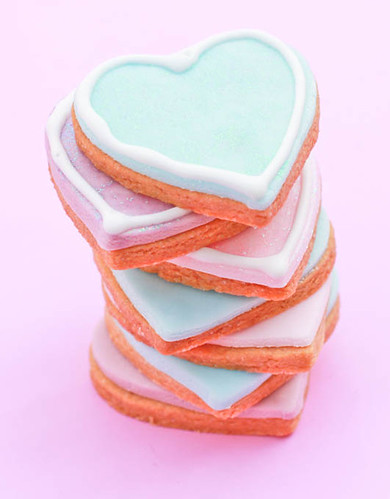
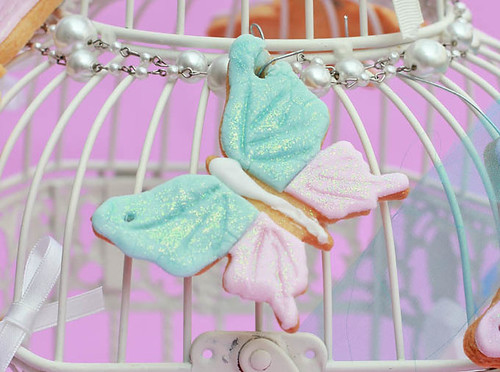
The cookies that I made are in the shapes of butterflies, dragonflies and hearts. I always tend to think of lush green fields, full of beautiful blossoming flowers with cute little butterflies when I think of Spring. To me it is the prettiest season of the year and I love it because of the awesome sunshine and warm weather it brings!

For the challenge we had to use Peggy Porschen's cookie recipe:
Basic Sugar Cookies
Makes Approximately 36 x 10cm cookies
200g / ½ cup + 6 Tbsp Unsalted Butter, at room temperature
400g / 3 cups + 3 Tbsp Plain Flour
200g / 1 cup Caster Sugar
1 Large Egg, lightly beaten
5ml / 1 tsp Vanilla Extract
Preheat oven to 180°C (160°C Fan Assisted)
Cream together the butter, sugar and any flavourings you’re using. Beat until just becoming creamy in texture.
Beat in the egg until well combined, make sure to scrape down the sides of the bowl.
Add the sifted flour and mix on low until a non sticky dough forms.
Knead into a ball and divide into 2 or 3 pieces.
Roll out each portion between parchment paper to a thickness of about 5m. Refrigerate for a minimum of 30mins.
Once chilled, peel off parchment and place dough on a lightly floured surface.
Cut out shapes with cookie cutters or a sharp knife.
Arrange shapes on parchment lined baking sheets and refrigerate for another 30mins to an hour.
Bake until golden around the edges, about 8-15mins depending on the size of the cookies.
Leave to cool on cooling racks.
Once completely cooled, decorate as desired.
Tips:
• Recipes commonly just wrap the whole ball of dough in clingwrap and then refrigerate it for an hour or overnight, but by rolling the dough between parchment, this shortens the chilling time and then it’s also been rolled out while still soft making it easier and quicker.
• It’s very important you chill them again otherwise they’ll spread while baking.
Re-roll scraps and follow the above process until all scraps are used up.
• Bake same sized cookies together otherwise mixing smaller with larger cookies could result in some cookies being baked before others are done.
• Rotate baking sheets half way through baking if your oven bakes unevenly.
• If wrapped in tinfoil/cling wrap or kept in airtight containers in a cool place, un-decorated cookies can last up to a month.

To decorate, instead of using just royal icing I also opted to cover the cookies with Marshmallow fondant and edible glitter as well.
Royal Icing
Adapted from Joy Of Baking
315g – 375g Icing Sugar, unsifted
2 Large Egg Whites
10ml / 2 tsp Lemon Juice
5ml / 1 tsp Almond Extract, optional
Beat egg whites with lemon juice until combined.
Sift the icing sugar to remove lumps and add it to the egg whites.
Beat on low until combined and smooth.
Use immediately or keep in an airtight container.
Tips:
• Royal Icing starts to harden as soon as it’s in contact with air so make sure to cover containers with plastic wrap while not in use.
Marshmallow Fondant
Adapted from Cake Journal
230 g White Marshmallows (I usually just 2 x packets of the pink & white marshmallows and use all the white marshmallows for one batch and the pink ones for another batch - that way I don't even need to colour the white marshmallows to get pink coloured fondant)
2 Tbsp Water
450g - 900g Icing sugar sifted (plus extra for kneading)
Spray oil
Food colors or cocoa powder (Flavouring optional)
Put the marshmallows in a heatproof bowl and add the water. Put the bowl in the microwave oven and heat it for approx. 2 mins. until the marshmallows puff up.
Stir the marshmallows until they get smooth. This is the time where you can add your chosen food color/cocoa powder or give it flavour. Note: Color the mixture a bit stronger than desired. You can always make the color lighter afterwards by mixing it with white marshmallow fondant.
Now add the icing sugar and stir the mixture with a well greased spoon. Keep adding icing sugar until it looks like a dough. Turn out the “dough” on a greased work board and with your hands greased with spray oil start kneading the marshmallow fondant. Keep adding a little icing sugar at a time until it is not sticky anymore.
Be careful not to use all the icing sugar as to much icing sugar can makes it too dry. It is ready when it feels pliable and ready to roll. If you are not using the marshmallow fondant straight away then rub a bit of spray oil on it and wrap it in cling-film and seal it in a airtight bag.
Note: Some uses the marshmallow fondant right away but I prefer to let it rest for a day before use.
If your marshmallow fondant feels very hard you can always warm it up in the microwave for a few sec. at a time. Then it should be more pliable to work with.


I had so much fun making these cookies! Hope you all do too!! And a very big thank you to Mandy from What the Fruitcake?! for hosting! x
p.s - Another awesome idea for these beautiful little cookies is they can be given as party bags for kids birthdays or even bombonieres for a wedding.. all you need to do is change the shape of the cookie to what ever you please.. the possiblities are endless!! :)
p.s - Another awesome idea for these beautiful little cookies is they can be given as party bags for kids birthdays or even bombonieres for a wedding.. all you need to do is change the shape of the cookie to what ever you please.. the possiblities are endless!! :)


The September 2010 Daring Bakers’ challenge was hosted by Mandy of “What the Fruitcake?!” Mandy challenged everyone to make Decorated Sugar Cookies based on recipes from Peggy Porschen and The Joy of Baking.