Hi Everyone!! I'm BACK!!!
Firstly, I just wanted to say a big 'Thank You' to to everyone for all your well wishes, very sweet of you all.
Secondly, I do apologise for taking so long to get this post up, been trying to figure out how to use Lightroom, Photoshop etc and its made me realise how technology illiterate I can be!
Thirdly, because I have taken soooo many pictures I've decided to only upload my top favourites and to showcase the other select few in a slideshow.
So for all you who do not know where Mauritius and Seychelles is (don't worry I have been asked by alot of people - geography was never my strong point either), its off the coast of Africa, near Madagascar (meet the pansies!). The flight took close to 13 hours (5 of which was spent crossing Australia) going there but coming back it was only 10 hours, both flights we had to transfer at Reunion Island, which is also a lovely little island in the Indian Ocean.
Mauritius is one island, whereas Seychelles is made up of many smaller islands (Mahé, Praslin & La Digue are the main ones). We only got to visit Mahé in the Seychelles which was a bit of a bummer. Both Mauritius and Mahé were very small. To give you an idea of exactly how small the islands were, it only took 1-1.5 to get from the South of Mauritius to the North (via the red line/freeway shown below) in non peak traffic, as the freeway runs straight through Port Louis (capital) and traffic can get pretty foul in the morning for peak hour traffic, yet for the same time, you could circle the entire island of Mahé.

 Map courtesy of Africa Maps
They have the same seasons as us, so its currently winter over there but the weather was great! The average temps were about 23-25
oC in Mauritius and in Seychelles it was 25-28
oC. The only bad thing is it would get quite cloudy at times and even rain but in the next hour or so it would clear up and become sunny again which was awesome. The currency used in Mauritius is the Mauritian Rupee (MUR) exchange rate was about MUR 36 to A$1 and in the Seychelles its Seychelles Rupee (SCR), SCR 10 to A$1 when we went. In Seychelles they also accept Euros.
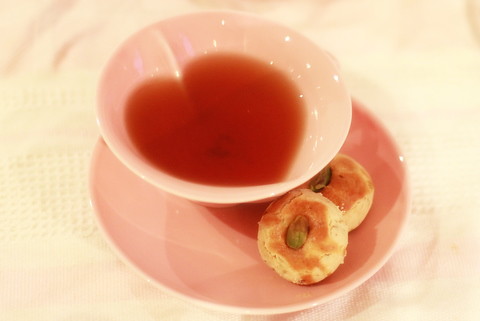
Now I know you're all wondering what kind of FOOD do they have there?? Well the Mauritians and Seychellians (??) traditionally eat Creole food. For me it was kind of like a mix of Indian, Chinese, African & French food. Fish was usually on the menu but they also had a lot of chutneys/pickled vegies also to go with, eggplant & squash were also quite common. I tried their Creole sauce, which was a tomato based sauce with vegies, it was very nice. The food was very flavoursome as they use lots of spices (cinnamon, cloves, nutmeg, chilli) that are readily available on the islands. Pizza was also a favourite over there, it seemed to be served nearly at every restaurant we were at! For me, Mauritius had better food than Seychelles. There was more variety and OMG! the fresh water prawns we had at Grand Bay were so big we mistook them for lobsters!! (see slideshow)
Our trip was broken up into 3 parts, Mauritius staying at Belle Mare (East Coast) then Seychelles then back to Mauritius (staying in the north at Grand Bay, literally where the red line ends at the top).
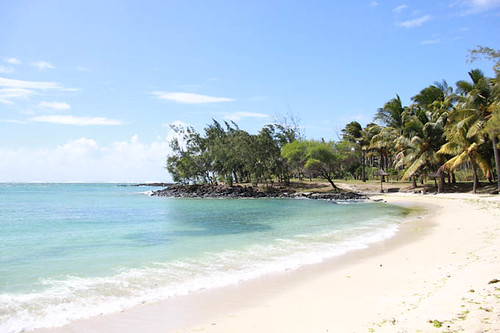 Belle Mare Beach, Mauritius
The accommodation that we had was excellent! The first place we stayed at was a resort called the
Belle Mare Plage. This resort is located in the more secluded part of the island, there weren't many shops or restaurants within walking distance from it but you didn't need it when most of the meals are included. You have the choice of half board (breakfast & dinner) or full board (B, L, D), usually I don't like to have meals included with the accommodation coz its usually pretty average but I was thoroughly impressed with the service and food that was served at the Belle Mare. Breakfast & dinner were buffet style, except much classier because as well as the precooked foods (roasts, desserts) that were served, there were also chefs at other stations cooking things fresh for you too. They had a pasta, pizza, Chinese cuisine, Creole cuisine and Salad Chefs. Dining there was truly heavenly... no wonder I've gained a few kgs!!
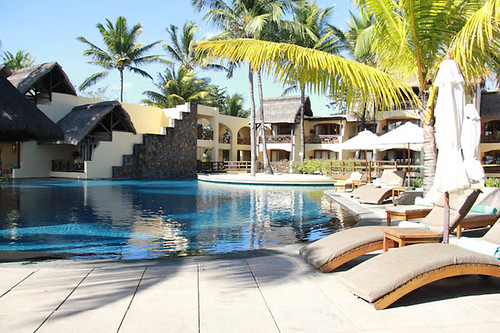 Poolside at Belle Mare Plage, Mauritius
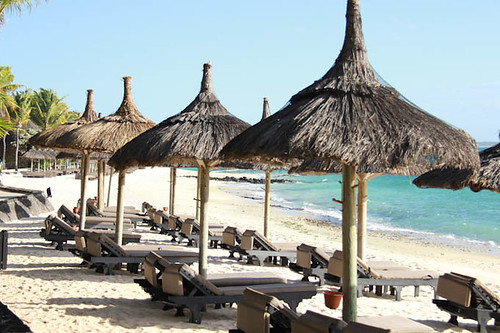 Beachside at Belle Mare Plage, Mauritius
Also unlike a lot of the other places I have visited, the generosity was amazing, in addition to the usual free stuff (gym, spa, pools) most water sports activities there were also free of charge e.g. snorkeling gear, glass bottom boat rides, kayaking, water skiing, they even offered lessons in snorkeling and water skiing on certain days!! Its perfect for honeymooners or people who like to relax and take it easy on a vacation, very club med style. To top it off it wasn't too expensive either worked out to cost approx $200 pp/day including the transfer to and from the resort.
 Belle Mare Plage, Mauritius
On the other hand, when we came back to Mauritius we stayed in Grand Bay (Grand Baie as they spell it). This part of Mauritius was much more lively, with stores and restaurants along the beach. It was here that I was able to try some of the local foods/restaurants outside of a hotel/resort setting, which is what I love to do in a foreign country! However, it was much more touristy than Belle Mare and I have to say that the beaches were not as beautiful because I found it was a little too crowded.
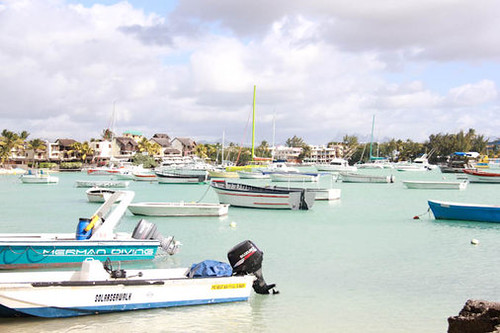 Grand Bay, Mauritius
The place we stayed at in Grand Bay was a boutique hotel called
Ocean Beauty, although it was small, the place was very nice and the service felt very personalized. The room we had felt like we had our very own small villa to ourselves. Every morning we had the choice of getting breakfast on the balcony in our rooms or served to us on the beach. They also had complimentary internet access and drinks (inc alcohol) available at the lobby. If you are looking for a good deal, I would definitely recommend this place. It's highly affordable yet still offered (in my opinion) 4 star rating facilities ($190 per night for 2 persons).
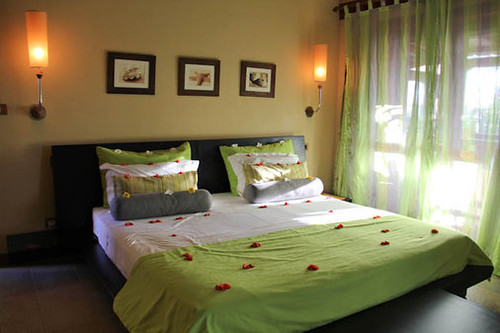 Our Room, Ocean Beauty - there were pretty flowers decorating the entire room when we arrived. It was such a nice little touch!
 Breakfast on the Balcony @ Ocean Beauty
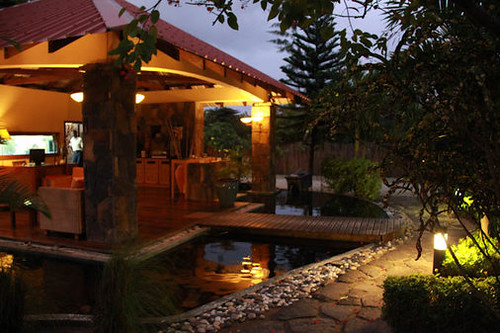 Lobby, Ocean Beauty
Here are some of the photos of the things we did when we were in Mauritius:
 Seven Coloured Sands of Chamarel, Mauritius - truely amazing, we also got to see the Chamarel waterfall (pics in the slideshow)
 I'le aux Cerfs (Island of the Deer), Mauritius - it had incredibly white sand, very commercialised though
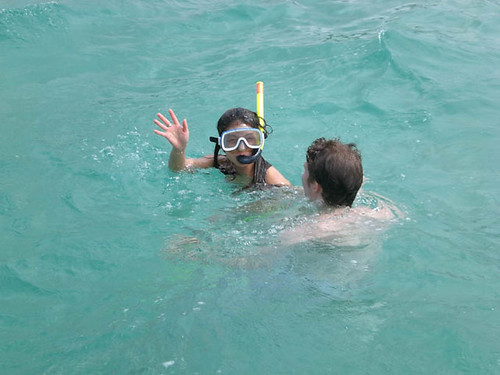 Snorkelling in the Indian Ocean, Mauritius - stupidly I am NOT a strong swimmer, the water was deep and I did not wear a life jacket... thank goodness the Log was there to keep me from drowning!
 Parasailing, Mauritius - would definately recommend it. It cost €45 (A$70) for 2 persons.
The Seychelles was absolutely stunning!! Hands down I have to say that their beaches were better than any other beach I have ever visited. The water was warm, the sand so soft and unspoilt. There were beaches along all the coast of the island, some inaccessible though. Mahé was very tropical, it was mountainous, lush and green with fantastic cliff faces that dropped straight into the ocean. The island had incredibly windy and narrow roads, which made driving around quite scary at times.
The capital of Seychelles is Victoria, it is a very small
city town. There's a main market which sold fresh produce as well as local spices. There weren't many shops, however there were lots of little "milkbars" scattered across the island. Accommodation in the Seychelles was slightly more expensive than Mauritius. We stayed on the west coast at
Le Meridian Barbarons, out of all the hotels, this was probably my least favourite. It was older than the other hotels we had stayed at, however the service was still great. The lagoon that Le Meridian was situated next to was beautiful, there was a sectioned off area for swimming as the main beach could get quite rough. For Seychelles we took a slightly different approach, we didn't join any tours but decided to hire out a car to travel around by ourselves and discovered many of the beaches/places on our own.
 Lobby, Le Meridian Barbarons
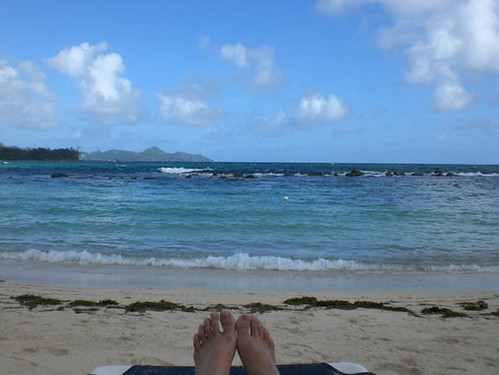 Lagoon, Le Meridian
Here are some of the magnificient places we went to visit in Mahé, Seychelles.
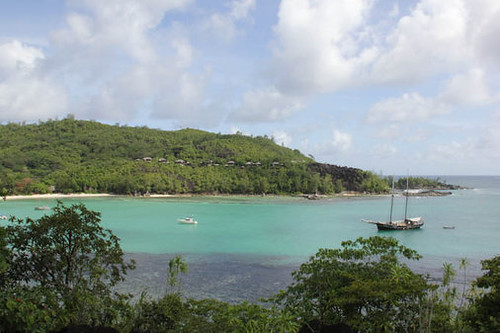
 Beau Vallon Beach, Seychelles - this is probably the beach where most tourists go.
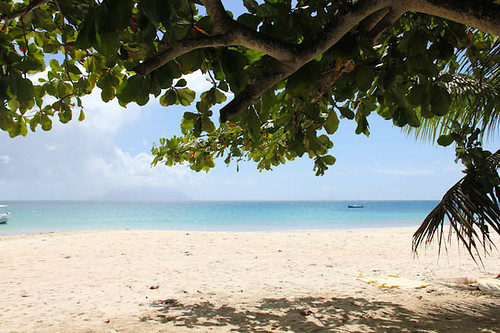 Beau Vallon Beach, Seychelles
 Beach near Bliss Hotel, Seychelles - magnificently pristine! Gorgeous little beach home to many crabs, the Log caught me one!! It was tiny, so cute!
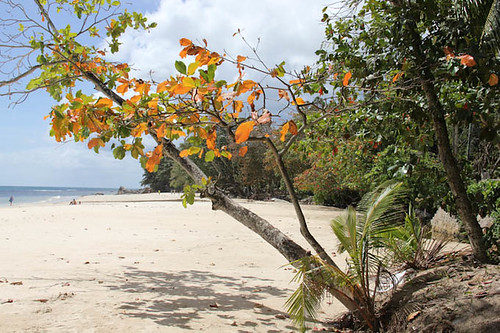
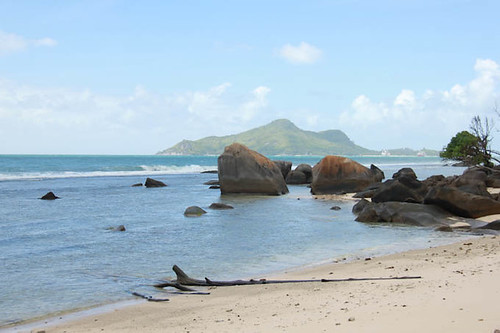 Beach along the road in Seychelles
 Victoria Markets, Seychelles
Town Centre, Mahé, Seychelles
 Port Launay, Mahé, Seychelles
 Sunrise in the plane flying to Seychelles
It was such a lovely experience! Great get away from the hustle and bustle to relax and truly indulge. If any of you get the chance I would definitely recommend it and feel free to email me if you have any questions or queries, especially if your planning your next trip there, would love to help out ;)